Dec 26, 2014

Keeping a rotisserie chicken SAFELY warm for a few hours


I was looking this info up for myself; thought it was worth posting here.

What to do when you've bought a whole roasted chicken, still warm, but dinner doesn't start for an hour or more? Even putting it in a low oven is going to dry it out -- and they usually don't start out all that great. Putting it in the fridge requires more oven time to warm it back up, which will also dry it out. But is it safe to leave them out?

Here's what I found on a forum thread:

Original question: Dinner is about 1.5 hours away. The chicken was warm when I purchased it.

Normally, I buy earlier in the day and just stick it in the fridge. This time, though, it seems that it would be better to try to keep it warm. I keep picturing it lingering too long in the "bacteria growth" temp zone considering it won't be in the fridge very long before I pull it out to start reheating.

Is my thinking off? If it's okay to keep it warm, what's the best temp for the oven?

Answer 1: I just leave mine on the counter until dinnertime. Then I cut it into quarters, stick it on a cookie sheet and reheat in the oven at 350 F. I've been doing this for years and we're all still kicking.

Answer 2: It will be fine. It needs to sit out for a minimum of 2+ hours before you have to worry about getting sick.

Answer 3: Actually, you have 4 hours in the "temperature danger zone" from 40° to 140°F. If your store keeps the chicken at or above 140°, you have 4 hours after it is removed from the heater before it is considered unsafe. These are the numbers I was taught at culinary school and have followed without issue since.

Reply from original poster: Thank you all very much! Dinner was delicious! 

And a professional chef on another forum says:

Remember that the temperature danger zone is 40 to 140 F. When you buy a rotisserie chicken, it is being held at a higher temperature than that and they package them as such that they try to keep them warm for a decent amount of time. Then after that, once it drops to 140, it takes time for all those little buggies to grow, get married, and reproduce. The government states [the safe zone is] 4 hours to pass through the temperature danger zone. Add that to the 45-1 hour that it will take the bird to drop to 140, if left in packaging and considering the ambient room temp., and you have a considerable time before it becomes a microbe bomb. Of course, I probably wouldn't try to stretch it that long but 1-2 hours, following government safety standards, should be more than safe.

So, I tried it. I kept two rotisserie chickens in a tote bag on the counter, with a folded dishtowel below (to prevent heatsink from my granite countertop; if you have wood or laminate counters, no need for this). I also took one of those big flat insulated foil-looking bags and folded it over the top of the closed chicken packages, then clothes-pinned the top of the tote bag shut. It sat for about an hour and a half before dinner.

Result? The temperature was a bit on the lukewarm side. It would have been better with a bit of oven time, I think. Although the breast was dry, and oven time would have made this worse. Maybe oven time sealed up with some extra chicken broth.

As for intestinal problems, that was three days ago, and we're all good here!


photo credit: terren in Virginia via photopin cc

Dec 13, 2014

Grain-free, gluten-free, "paleo" granola; yummy, healthy treat!

Cranberry Walnut Paleo Granola, from Cook Eat Paleo

I cannot believe I've never posted a link to this recipe for Cranberry Walnut Paleo Granola from Cook Eat Paleo! I discovered it more than a year ago, and it's one of my favorite low-sugar, grain-free treats. I'm not doing the whole pure paleo thing, but there are components of the diet that line up with my nutrition philosophy, so I find paleo food blogs a great source for recipes.

I've made my own variation of the original Cranberry Walnut Paleo Granola version (notes below). I haven't made the Cinnamon Raisin Spice Paleo Granola, but it sounds incredibly tasty, too!

This would make a great sugar-free Christmas goody giveaway. (I've also put together a list of 12 Homemade Christmas Treats That Aren't Sweets.) It has no processed sugar, and is sweetened with a small amount of maple syrup, making it vegan-friendly, too.

And here's my version...

Cranberry Walnut Paleo Granola Recipe

I have halved and tweaked the original recipe. This fits nicely on a 10 x 15" cookie sheet; and the 4-cup measuring cup works perfectly for a mix-and-pour bowl.

1/2 cup coarsely chopped walnuts
1/2 cup coarsely chopped pecans
1/2 cup coarsely chopped almonds
1/2 cup pepitas (pumpkin seeds without hulls)
1/2 cup unsweetened flaked coconut - larger flakes are better
1/8 teaspoon table salt (or 1/4 t. sea salt or kosher salt)
1 T. coconut oil, melted
1.5 T. maple syrup
1/2 cup dried cranberries and/or other dried fruit; I like to use these pre-chopped prune bits called "Amazins"

Preheat oven to 300 degrees F. Prepare a rimmed cookie sheet by lining it with parchment paper, or lining it with foil that's oiled or sprayed.

Combine nuts, pepitas, and coconut in mixing bowl. Mix together coconut oil and maple syrup until well combined, and stir into nut mix.

Spread the mixture evenly on the prepared cookie sheet. Optional: sprinkle with 1/4 t. kosher  or sea salt.

Bake for 12-15 minutes, until coconut is just lightly browned. (Your oven may vary.)

Remove from oven, add the dried cranberries and/or Amazins, and toss to combine. Cool completely before serving.
.

Disclosure: links go to my Amazon store, but you can find them at your local grocery.


Nov 26, 2014

7 roasted sweet potato recipes (including the most beautiful sweet potato dish ever!)

I've never been a fan of the traditional sweet potato topped with marshmallow dish -- even as a child. But sans all that sugar, they are quite healthy, and delicious to boot! I love to make simple, stove-top mashed sweet potatoes, with a little butter, maple syrup, and cinnamon added at the end. Try it along with a salty and/or spicy pork chop - yum!

So I'm looking for some oven-roasted sweet potato recipes that recreate that same flavor profile for Thanksgiving this year, and I thought I'd share my research. Here are a few. (Spoiler: I'm saving the most beautiful one for last!)


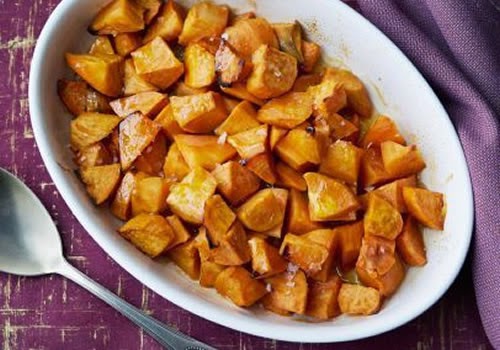
Roasted Sweet Potatoes with Honey and Cinnamon

By Tyler Florence, on Food Network. 5 stars, over 140 reviews.


Honey Roasted Sweet Potatoes

By Ellie Krieger on Food Network; 5 stars, over 160 reviews. -- I like that this one goes light on the honey.


Cider Roasted Root Vegetables

By Elise at Simply Recipes. I always consult this site when looking for a new recipe; I have never had a bad dish here! This version sounds delicious. 

Branching out from straight-up roasting...


By Creekside Cook. The author says, "this post on my old blog was responsible for over 1 million hits." And I can see why! It sounds amazing. "Spicy, sweet, crunchy outside." But also a little time consuming. I probably won't try to pull these off for Thanksgiving, but they may get a chance on a less hectic day.

Here's an easier option...


Easy 15 Minute Roasted Sweet Potatoes

By Layers of Happiness. This recipe uses the microwave -- which I would totally do for an everyday meal! But I might try this same method in the oven for a special day.


Twice Baked Sweet Potatoes with Chipotle Cream

by Chez Us -- The description on this one won me over: "After I baked the potatoes, I scooped out their flesh and mixed it with some fried pancetta, sauteed green onions, a little butter and sour cream and a handful of freshly grated Gouda. After re-baking the stuffed potato skins until warm, I topped each one with a slight dollop of chipotle sour cream."

----

And here it is: this year's winner of the annual "Most Beautiful Sweet Potato Dish Award"! (Okay, that's not a thing, but when you see this, shouldn't it be?)


Crispy Sweet Potato Roast by Smitten Kitchen

Here's the author's summary:

You thinly slice a whole lot of sweet potatoes [you can use a mandolin or food processor] and arrange them in a butter and olive oil-brushed dish, and brush them with even more. ...slide slivers of shallots between... shower the whole thing with salt and black pepper... bake it covered long enough that the insides get tender, and uncovered long enough to get the tops brown and crispy.

This was posted six days ago, and as of today, it has 150 comments. Readers have been quick to share their own improvisations on the basic recipe. Here are some of the best (IMO)...

Reader tips and variations:

Add fresh rosemary and a splash of pure maple syrup towards the end.

I sprinkled feta and toasted pine nuts on top, instead of the salsa verde. It was amazing!

I crumbled feta cheese in the gaps and added some chili and lemon juice to the salsa verde and the result was great.

Very delicious. Sprinkled za’atar on top and made a sauce of yogurt, tahini, lemon, and a bit of salt.

I’ll be making this – with the addition of crisp pancetta and fresh thyme!

I am going to [replace] the scallions with poblanos and make a little chimichurri sauce to drizzle on top.

I usually do my holiday sweet potatoes with maple, chipotle, ancho, smoked paprika -- and fresh italian parsley on top after roasting.

The way I’ve been making them for years is in a gratin with a ton of garlic and salty butter and parmesan and breadcrumbs, the thinner the layer the better, b/c the top gets all crispy, crunchy with the parmesan and buttery breadcrumbs.

Have you ever tried chipotle chili powder with sweet potatoes? Life changing!

I made this tonight and topped with some leftover creme fraiche, it was great! The texture turned out perfectly. I used only 2 lbs of sweet potatoes and scaled everything down accordingly, but used all the same cooking times, 45 mins covered, 10 uncovered.

This was EXCEPTIONALLY GOOD! And reheated the next day in the toaster oven? Nom nom nom!

I made this tonight and it was GREAT. I added a bit of fresh thyme both underneath and on top! I halved the recipe and put it in a 1-quart oval dish. I also found that with really large potatoes I halved the slices and put the curved side up and they fit really well in the dish. At the end my oven didn’t brown it very well so I tossed it under the broiler and watched it like a hawk!

I made this with a mélange of sweet potatoes and russet, and added a teaspoon or so of dried sage, salt and pepper to the remaining butter/olive oil mixture… divine!

I topped it with thinned Mexican crema mixed with minced chipotle in adobo. It was a hit!

I have used a food processor to slice potatoes, and it works very well. You just have to buy potatoes whose diameter will fit in the tube, and then guide them / stabilise them with the pusher.

Also culled from the comments, a few extra tips from the author:

Cast iron does seem to give food a nice crisp... but I used a Pyrex baking dish last time I made this and it crisped up just fine.

In reply to reader's questions: "Do you do everything and bake it completely and then just reheat day of? Or do you arrange everything and bake the day-of?" — Either way will work.

Re, thin slices — Yes, I use a mandoline.... Re, protecting your fingers, I have one rule: the last inch isn’t worth it! I just don’t use the slicer for the last inch of whatever I’m cutting. I’ll hand-chop it. All of my fingers are intact, so I’d say this system is working out for me. :)

-------------------

All images by the respective blog owners.

Nov 23, 2014

Chai Tea for Two (latte, if you like)

I  remember the first time I tasted chai, in a friend's kitchen. The creamy texture and slightly spiced flavor took me by surprise. "Oh wow!" I said. "This is like drinking pumpkin pie!"

image: livesimply.me

Since that first taste, I've loved chai, but I don't drink it often because if you make it with a purchased mix or buy it in a coffee shop, it's usually loaded with sugar. However, inspired by this recipe for Chai Tea Latte from Live Simply (and modified to reduce the syrup), I've been making this the past couple days, and it's the perfect cold-weather pick-me-up when you want something richer than plain tea. (The original recipe makes enough for four servings, so you can enjoy one right away and then keep the extra on hand in the fridge. Smart! I love make-aheads!)

It uses maple syrup for the sweetener, but you can substitute the sugar or sweetener of your choice. I also replaced the half-and-half with culinary coconut milk; the canned kind; not the thinner stuff that comes in quart cartons. But you can use half-and-half, or another dairy substitute that you like. I've also streamlined the process a bit because, well, I'm impatient! I use a ready-made spice mix. And I use the microwave, and just let it steep for two or three minutes. But if you're patient and have the time, you can let it steep the full five minutes at each step.

Chai mixture:
1 cup water
1-1/2 teaspoons pumpkin pie spice or apple pie spice*
1 tea bag or about 1.5 teasp. loose tea -- any unflavored black tea will do
1 TB pure maple syrup
1 or 2 grinds of freshly ground black pepper (optional)

Latte additions:
1/2 cup milk of your choice     
    (recommended: something rich and somewhat fatty, like coconut milk or half-and-half.)
maple syrup to taste

Put the water and spice mix in a glass measuring cup or other microwave-safe container and heat until it steams. Take it out, and let sit for at least two and up to five minutes. Cut open the tea bag and pour the contents into the hot water. Add a couple grinds of black pepper if you like. Return it to the microwave and heat again till steaming. Let it steep for three to five minutes.

While it's steeping, prepare the milk. Heat it slightly in the microwave. Do NOT let it boil. 

Frothing the milk is optional -- but it's the thing that takes this drink from chai to chai latte. There are various ways to froth the milk. You can do this with a stick blender, or by hand, using this method, or just by holding a wire whisk and rolling it quickly between your palms like this: 

(The baby orangutan is optional.)
At this time, you can also preheat your two serving cups, to help the chai stay hotter. Fill them with the hottest water that will come out of your tap, and let that sit till you're ready to serve.

Once the tea is done steeping, dump the hot water out of your serving cups. Pour the tea mixture through a fine sieve into another container. Rinse the sieve, then pour through it again as you're decanting the tea into each serving cup. Top with even portions of the milk, and taste to see if you want more sweetness; sweeten to taste.

Then snuggle into a cozy chair and drink that pumpkin pie!

*If you don't have pumpkin pie or apple pie spice mix, you may use:
1 whole clove (optional)
1 tsp ground cinnamon
1/2 tsp ground ginger
pinch ground nutmeg (optional)
pinch ground allspice (optional)

Nov 15, 2014

Crockpot Green Bean Casserole

Image from campbellskitchen.com

Save your oven for other things, and save some day-of panic: Here's the classic green bean casserole that everyone wants for Thanksgiving, tweaked to work in a crock pot / slow-cooker, and with optional make-ahead instructions.

Slow-Cooker Green Bean Casserole Recipe

Slow-Cooker Size: 4- to 6-quart       Makes 16 to 20 servings

30 oz. fresh or frozen green beans, cooked and well-drained
2 (10 3/4-oz.) cans cream of mushroom soup, undiluted
      or make your own
1/4 to 1/2 c. shredded mozzarella
2 (4.5-ounce) jars sliced mushrooms, drained  (optional)
1 T. dried minced onion (omit if using garlic-flavored soup)
1/4 teaspoon pepper
1 - 1.5 t. kosher salt (taste before adding)
1 (6-ounce) can French fried onion rings

Combine first six ingredients in a large bowl. (Beans thru pepper.)

Optional: Store covered in your fridge until ready to cook. Add an extra hour of bake time because it will be cold when it goes in the crockpot.

Spoon casserole mixture into a lightly greased slow cooker.

Cover and cook on LOW 2 hours. (3 hours if all ingredients are refrigerated.)

Taste and add salt as necessary. Sprinkle onion rings on top of casserole. Cover and cook on LOW 30 more minutes.

(I've lost the source for this recipe. If you recognize it, please comment.)

Nov 14, 2014

Thanksgiving and Christmas food prep FAQs

Food image from PopSugar

Trying to plan a Thanksgiving or Christmas meal?


Here are some tips, calculators, and checklists.

Image from theKitchn

Turkey


For any meat, here is the essential gadget to make sure your meat comes out perfectly every time: Meat thermometer with remote and two probes.* Getting a model with two probes means you can stick one probe in the white mean, one in the dark meat, and measure both without opening the oven or grill!


Image from farmflavor.com

Ham


Image from campbellskitchen.com

Vegetables

  • Make-ahead crockpot green bean casserole. Save your oven for other things, and save some day-of panic: Here's the classic green bean casserole that everyone wants for Thanksgiving, tweaked to work in a crock pot / slow-cooker, and with optional make-ahead instructions. Classic green bean casserole for crockpot.
  • Roasted vegetables timetable. The number one must-do side dish at our house -- besides the turkey, of course. Oh, and pumpkin pie! Okay, the third-most popular dish: roasted vegetables. A slow roast works oven magic, turning onions, carrots and bell peppers into sugar-free candy-sweet goodness! Here's a timetable for roasted vegetables: what goes into in the oven when, to make everything come out perfect.

This is my favorite pan for roasted vegetables, and anything else that can be made on a rimmed cookie sheet: USA Pans Jellyroll.* LOVE LOVE LOVE THIS PAN!!! Bakes evenly, rinses off like brand-new teflon every time. Everyone in my house has been threatened to not even think of co-opting this for some craft or garage project!


All foods: How much per person?


  • Here's a thorough chart from Good Housekeeping, showing per-person serving recommendations for 8, 10, 12, 16, 20 and 24 people, for 10 popular holiday foods. It includes turkey, stuffing, potatoes, green beans, sweet potatoes, cranberry sauce, pie, and more. View the pdf.


Holiday meal planning checklists and calculators


  • An Excel spreadsheet that you can plug your number of guests into (including how many are vegetarians!), and it tells you how much food to buy. The page where you download it is a little confusing; just scroll down until you see this:

Would you rather have pictures?

Here's a well-done info graphic from The Savory, showing turkey thawing time, brining time, brining recipe, roasting time, and more. This image is only one small part of it:

Image from The Savory

* Note: Product links in this post are to my Amazon store where I get a smidgen of the sales, but I truly use and fanatically love every product I link to.

Nov 13, 2014

20 Cranberry Sauce Recipes

A variety of cranberry sauce recipes, for Thanksgiving or Christmas...


image: OurFamilyEats

Roasted or Baked Cranberry Sauce

Simple Roasted Cranberries (Gluten Free, Grain Free, and Paleo) from OurFamilyEats. I love that this one really is simple, and that it uses maple syrup for the sweetener.

Bobby Flay's Baked Cranberry Sauce, which calls for finishing it off with a quarter cup of bourbon. Some reviewers substituted other liquor or liquers (orange being a popular flavor). 41 reviews, and every one of them 4-star!

Roasted Cranberry Sauce with Herbed Candied Walnuts, from Bon Appetit. Lots of sugar in this one!

Boozy and Baked Cranberry Sauce. Even though it has "boozy" in the name, its alcohol content is much less than Mr. Flay's. Also looks easy: just four ingredients.


Sugar-Free Cranberry Sauce

image: The Vintage Mixer


And another "sugar-free" cranberry sauce recipe, but it uses honey. You could sub maple syrup or your preferred sweetener. It also includes crushed pineapple; interesting!

And another. This one calls for Equal, but a couple commenters said they used Splenda and it worked well.

Paleo-friendly cranberry sauce; uses apple juice and maple syrup for sweetener. (Listed as 
Paleo/GF/DF/EF/SF/NF)

Another Paleo cranberry sauce, from nomnompaleo, using sweet cherries and apple juice.


Traditional Stove-Top Cranberry Sauce Recipes

image: Simply Recipes

Every recipe I've ever tried from Elise at SimplyRecipes has been great. Here's her traditional recipe. But she also suggest various add-ins. I might try blueberry! 

(And her recipe is the same as the most popular cranberry sauce at AllRecipes; more than 1200 reviews, and still five stars!) 

Another classic cranberry sauce recipe; this one from Pioneer Woman. Similar to the others, but uses maple syrup in place of sugar, and orange juice in place of white sugar.

Unique Cranberry Sauce Recipes

This page at Fun & Food Cafe features five different cranberry sauce recipes, with unusual ingredients. I like the sound of the second one, which has raspberries and walnuts!

Ginger Cranberry Sauce, via RecipeLion.

Another from the same source: Cranberry Sauce with Apples (and Mandarin oranges, and pineapple).

How about Cranberry Sauce with Jalapenos? I think that would be a big hit with smoked turkey.

Happy Thanksgiving!


Nov 2, 2014

The three best ways to keep guacamole or avocados from turning green!

Image from The Kitchn

I used to just use plastic wrap, wrapped as tight as possible. Maybe if you could get it perfectly smooth over every molecule, but that's not happening! Okay, so I heard about adding the avocado pit to the bowl. Tried that; no help. Adding lime juice or tomato slices on top? Helps a little, but not enough.

One time when I wanted to doggy-bag the last of my favorite restaurant guacamole, and no plastic wrap at hand, I had an idea. I smoothed the guacamole out, then spread a layer of sour cream over it, completely covering it so no green could be seen.

Next day, it was still a bright, fresh green -- nice! And I don't mind stirring a little sour cream into my guac. I wondered if the same thing would work for cut avocados. Sour cream turned out to be a little too soft for this application -- but softened butter worked great. Again, you just have to spread it thick enough so no green shows through. Then wrap it with plastic wrap to keep the butter in place.

The reason these both work is because they completely seal the avocado off from any oxygen.

Now I see that The Kitchn has a similar method for keeping guacamole from turning brown: cover it with a half inch of water, in a closed container in the fridge. For up to three days, they say. Because the guacamole is so fatty, it's not going to mix with the water. The author says, "After I take it out and pour off the water, I stir up the guacamole and the texture is no different than when it was made. In fact, I like the taste of guac after it has sat in the fridge overnight; I find the cilantro and onion flavors are blended better."

Serious Eats says that you can do the same thing with cut avocado pieces. "I store my unused avocado pieces in a plastic container filled with water in the fridge for up to overnight. Perfect, oxygen-free seal for any shape, and because an avocado is so dense and high in fat, water is slow to penetrate it (it'll eventually become softer)."

So there you go: all you need to keep the green stuff green is sour cream, butter, or water. I love simple solutions!

Oct 20, 2014

Fed Up: the film the food industry doesn’t want you to see

I've already mentioned sugar addiction here.


I just learned of this film; haven't vetted it. Sounds pretty one-sided, but still, there's truth...


Oct 17, 2014

An experiment that shocked the scientists: Reheating pasta improves its nutritional qualities!


From a report by BBC: 
...what if you could change pasta or potatoes into a food that, to the body, acts much more like fibre? Well, it seems you can. Cooking pasta and then cooling it down changes the structure of the pasta, turning it into something that is called "resistant starch."
According to the report, the advantages of this are:

  • Smaller rise in blood sugar
  • More pre-biotics to feed the good bacteria in your gut
  • Fewer calories absorbed.

But this gets better...

Curious but doubtful as to whether reheating the pasta would retain the benefits of cooling, the BBC asked a couple doctors to conduct a small experiment with nine participants. They tested eating the pasta original hot, after it was chilled, and chilled then reheated, testing the changes in their blood sugar several times. The results?
Just as expected, eating cold pasta led to a smaller spike in blood glucose and insulin than eating freshly boiled pasta had. 
But then we found something that we really didn't expect - cooking, cooling and then reheating the pasta had an even more dramatic effect. Or, to be precise, an even smaller effect on blood glucose.

In fact, it reduced the rise in blood glucose by 50%. 
This certainly suggests that reheating the pasta made it into an even more "resistant starch." It's an extraordinary result and one never measured before.
At least one of the doctors will be continuing the research on a more scientific level, to see whether adding resistant starch to one's diet can improve some of the blood results associated with diabetes.

This doesn't mean you can pig out on big bowls of spaghetti, but it does make that leftover lasagna a little more guilt free!

Read the full article

Oct 2, 2014

Brat and cabbage soup

Bad pic; good soup!
I've been waiting for a day cool enough for soup; today was the day! I'd been wanting to try out this recipe I spied on Taste of Home recently, when I was trying to figure out how to use up some leftover sausages -- including some grilled bratwurst.

This soup exceeded my expectations! I love that it takes one of my husband's favorite foods (brats/sausage), and makes it into a fairly healthy meal! Kick it up to the next level by serving with a hearty bread made into garlic toast.

Bonus: it's really easy! We'll definitely be having this again.

I halved the original recipe, since I was cooking for two. (The recipe below is the half portion.) Double these quantities to serve a larger group, or to have some to put in the freezer. Several reviewers said that it tasted just as good if not better, reheated the second day, so this would make a great make-ahead meal, too.

Leave out the beans to make it Paleo and Whole30 compliant.

Brat and Cabbage Soup Recipe

Serves 4

2 cups chicken broth or stock (or more, for a long simmer)
2 - 3 medium carrots
1 stalk celery
1 medium onion
1/2 tsp dried thyme
1/2 tsp dried basil
1/4 tsp salt
1/4 tsp granulated garlic
2 - 3 brats, cooked according to package directions
1.5 cups shredded cabbage
1 can (14 oz.) great northern beans, rinsed and drained (optional*)

Put the broth on to boil in a large saucepan. Chop the carrots, celery and onion into bite-size chunks, and add them to the saucepan, along with the seasonings. Once the mixture boils, turn it down to medium low and simmer till the carrots are tender.

Slice the brats in half lengthwise, then into half- to one-inch slices; add them to the pot and heat through. At this point, you can turn the heat to low and let it all simmer till 20 minutes before serving time. If the broth gets too low, add a little more chicken stock. Or put some or all in the freezer for a future meal.

About 15 to 20 minutes before serving, add the shredded cabbage and beans. Stir gently and continue to simmer. Serve with fresh-from-the-oven garlic toast.

*To make this a lower carb dish -- with balanced carbs and proteins -- just leave out the beans. Here's the nutrition info with beans:
Nutrition Facts
Servings 4.0
Amount Per Serving
Calories 276
% Daily Value *
Total Fat 13 g20 %
Saturated Fat 5 g25 %
Monounsaturated Fat 0 g
Polyunsaturated Fat 0 g
Trans Fat 0 g
Cholesterol 38 mg13 %


Total Carbohydrate 26 g9 %
Dietary Fiber 8 g31 %
Sugars 5 g
Protein 16 g32 %

And here it is without:
Nutrition Facts
Servings 4.0
Amount Per Serving
Calories 206
% Daily Value *
Total Fat 13 g20 %
Saturated Fat 5 g25 %
Monounsaturated Fat 0 g
Polyunsaturated Fat 0 g
Trans Fat 0 g
Cholesterol 38 mg13 %


Total Carbohydrate 11 g4 %
Dietary Fiber 3 g10 %
Sugars 5 g
Protein 11 g21 %

Popular Posts