Apr 29, 2012

One-ingredient, gluten free, low carb pie crust (plus some cute dishes)

Disclaimer: If you're already familiar with my no-bake lime cheesecake shooters, you'll recognize that this post is a bit of a rehash, but I think this crust is such a problem-solver it deserves a post of its own.

This crazy-simple crust is made of: pecans! That's it! No butter needed. So it's completely gluten-free, pretty low carb, and you can be assured there's no weird man-made chemicals in it. (Pecan nutrition facts here.)

In the photo below, you can see two different blender blades that came with my bullet-style blender (currently my favorite kitchen gadget). The four-bladed piece (top center in the photo) chops things up from coarse to fairly fine, depending on how long you run it. The shorter, two-bladed one (on the left) minces things down to a fine powder or -- in the case of nuts -- butter.


In the pic below you can see the difference. The left-hand image shows the pecans after running them with the four-blade piece for a few seconds. This would work just fine for crust if this is all you have. But if you have the second kind of blade, you can grind the pecan pieces until they're so fine they begin to stick together, like in the image on the right, below. This gives you something with the look and consistency of a crust made of graham crackers and butter. Neat, huh?!


Then you just place a small amount of ground nuts in the bottom of your serving vessel, and tamp it down with the top of a bottle (securely capped and very clean, of course). I use these little shot glasses (actually votive holders form Hobby Lobby), and 1 tablespoon of pecan crumbs works perfectly. 


And you're done! With the crust, that is. Fill it with your favorite no-bake pie filling, chill, and you've got a healthy, easy -- not to mention adorable -- dessert.

Here are various dishes you could serve such in:


Cheap-o "shot glasses" (votive holders) from Hobby Lobby; you could also find these at Walmart, etc. I'm sure.


4 oz. Mason jars. If you keep the filling short enough, you can cap these for easy, spill-proof portability.


6-oz. Libby glass bowls with plastic lids. Ditto on the portability. 

Weck jars. Available in sizes from 3 to 6 oz.

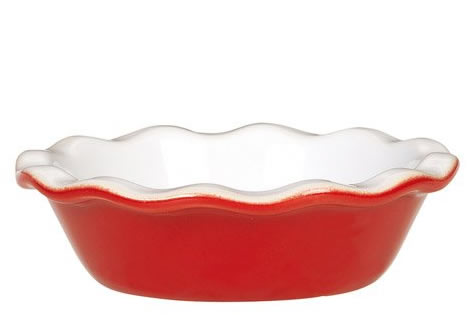
Pricey but adorable individual pie pans. 8 oz; also available in olive.

(Disclosure: Some of these links go to my Amazon store.)


Apr 28, 2012

When "Sugar Free" isn't

I don't normally buy Cool Whip. It's not that I'm a food snob (okay, I kinda am), but mostly that A) whipped cream is not that hard to make, B) I trust whole food over manufactured food, and C) whipped cream tastes better!

But today I was making some lemon cheesecake desserts (the lemon version of my lime cheesecake shooters) to take to a shower tomorrow, but because of scheduling issues, they have to be done tonight. Whipped cream won't last that long. So I decided to go with Cool Whip for the topping, since it's very stable.

I grabbed a tub of the fluffy stuff -- the "Sugar Free" version -- and headed home. Then I read the label.

First ingredient: water. Second ingredient: corn syrup.

Are you kidding me?! It has corn syrup, and you're calling it sugar free? Is this even legal?

(The Harvard School of Public Health includes corn syrups on its list of added sugars in disguise. Corn syrup has been proven to raise triglycerides even more than and faster than sugar.)

Lesson learned: Always read the label -- before you leave the store!


Apr 25, 2012

Asian lettuce wraps


This is another one of those dishes that you can prep early in the day, and throw together in minutes come dinner time. Also low carb and low fat!

Recipe: Asian lettuce wraps

Makes 4 servings

about 1.3 lbs. ground turkey
1/2 large onion, sliced thin
1 teaspoon sesame oil
3 T. lower sodium soy sauce
1 pkt. Splenda or equivalent sweetener
1/4 to 1 teaspoon crushed red pepper (less for mild; more for hot)
1 T. fresh ginger, minced
1 clove garlic, minced
2 teaspoons ground coriander
2 cups coleslaw mix with carrots, (or more)
butter lettuce or romaine lettuce leaves, for wraps
fresh cilantro and chopped cashews, for garnish, optional

This is the slaw mix I use:


Brown the turkey and onions in a large skillet; when the turkey is mostly browned but still showing some pink, drain the fat. Meanwhile, combine the sesame oil through the crushed pepper in a small bowl and set aside.


Add the ginger, garlic and coriander to the pan; stir-fry for a couple minutes.


If you're prepping ahead of time, you can stop here and refrigerate the meat and sauce. When ready to serve, just reheat and proceed. Also, since I was just cooking for two of us, I pulled out half the meat and put it in the fridge for lunch the next day. Be sure to only add half the sauce and cole slaw to the pan if you do this.

Add the cole slaw and the soy sauce mixture. Cook and stir constantly for one or two minutes.


(I'm warming up leftovers the next day in the photo above; that's why the skillet's smaller.)

Serve the meat mixture with lettuce leaves to fill, and roll up to eat. Offer cilantro and cashews for topping, if desired.


Apr 22, 2012

Recipe review: Hummus salad dressing, Mediterranean salad


Last week, Kalyn's Kitchen posted a recipe for Mediterranean Salad with Hummus Dressing, and I made it for dinner that night. I mean, hummus-based dressing -- how genius is that?

To suit our tastes, I made a few tweaks.

  • Added a sliced roasted chicken breast, for added protein. (Picked up at the deli.)
  • Swapped out red wine vinegar for the lime juice in the dressing. (To suit the hubs' taste.)
  • Added a little Splenda; again for my husband. I love things sour; him, not so much. (I mean he doesn't like things sour; not that I don't love him so much!)
  • Substituted sun dried tomato slices for the olives, since neither of us are olive fans.
  • Sprinkled a little zaahtar seasoning on top.

It made a tasty, easy-to-throw together meal. Still plenty zesty, even with the tweaks. Two thumbs up!

Apr 21, 2012

Sugar free chocolate bark + your favorite toppings!


Here's a really simple recipe that looks and tastes completely decadent, but it's low carb/South Beach diet friendly, because it's sugar free! You can top it with whatever toppings float your boat; I first tried it with a mix of chopped almonds and unsweetened coconut on one end (shown above), and salty pepitas (roasted hull-less pumpkin seeds) on the other.


I served this for dessert last night -- just the hubs and me. Here's what it looked like when we started...


Here's what it looked like when we were done:


And no, he is not putting that back in the pan!

Clearly, the almond/coconut end was the favorite! The slight sweetness of both coconut and almond goes nicely with the semi-sweet, almost bitter flavor of this chocolate. I think the pepitas would taste great with a sweeter, perhaps milkier chocolate. I'll try that another day.

But today, there's a new batch in the fridge that's all almond/coconut!

Recipe: Sugar-free chocolate bark

Note: If you're not avoiding sugar, substitute up to 1/4 c. of sugar for the Splenda.

6 T. butter
1 oz. unsweetened chocolate (one square of baking chocolate)
1/4 c. + 2 T. cocoa (unsweetened)
6 pkts. Splenda
1/2 t. vanilla
toppings of your choice, probably around 1/4 to 1/2 cup

Prepare a 10x15 pan by lining it with parchment. Trim the parchment if necessary so that it extends over the long sides of the pan, but does not come up the short sides of the pan at all. (My photos above show how not to do that!) Clip the parchment to the sides, if you like, with some clothespins or other large clips. Set aside.

Melt the butter and the baking chocolate in the top of a double boiler over simmering water. Stir occasionally until melted. Add in the cocoa and Splenda, and continue to stir until the mixture is smooth. Add in the vanilla, stir until combined, then pour it into the prepared pan. Spread the chocolate out to a fairly even smoothness. It doesn't need to be perfect.

Sprinkle your toppings of choice over the chocolate, then chill for a couple hours at least. Keep it refrigerated when not serving (or snitching) it, because it softens quickly.

If you're looking for a recipe with a different sweetener, here are some other options:

Apr 20, 2012

Quick chipotle pork tacos


This is slightly adapted from Chipotle Pork Tacos by Our Best Bites. It's a great dish to prep earlier in the day -- or the night before -- then throw together just before dinner. Even the prep is pretty easy, but once everything's ready to go in the skillet, it cooks in minutes.

The original recipe calls for lime zest, lime juice and brown sugar. But to eliminate the sugar and still keep things tangy and sweet, I substituted orange for the lime. I think it tastes great, and it even got an enthusiastic thumbs up from the hubs, who usually isn't too fond of citrus in meat dishes.

Recipe: Quick Chipotle Pork Tacos
Serves 4.

3 boneless pork loin chops, about 3/4 to 1" thick (about 1 lb.)
1 ½ tsp grated orange zest
1 T. fresh orange juice
1/2 tsp dry oregano
1 - 2 tsp chopped chipotle chiles in adobo sauce
2 garlic cloves, minced
¼ tsp kosher salt
---
2 T. olive oil, divided
1 c. thinly sliced onions
4 large whole wheat tortillas
sour cream for topping
chopped red or green onion and chopped cilantro for garnish, optional

Zest the orange with a fine grater, so that you get just the orange zest, not the white pith.


Combine orange zest and juice, oregano, chipotles, garlic, and salt. Set aside. 


Trim the excess fat from the pork chops, then slice into strips about 1/2" wide. Cut the longer strips in half. 


Toss the pork strips with the orange juice mixture. At this point you can cover the pork and the onions with plastic wrap, and stick them in the fridge until you're ready to cook.


Heat a large skillet over medium heat and add 1 T olive oil. Add onions and sauté for four minutes or until tender.  Remove from pan and set aside. Add 1 T of olive oil to pan and add pork strips. Saute for 3-4 minutes or until no longer pink. I like to just leave them on one side until you see white creeping around the edges...


...and the first side is nicely browned, them flip them over. Be careful, though; you really don't want to cook them a total of more than about four minutes, or they get too tough and chewy. It might help to take the pan off the heat while you turn them over, then return to heat for a minute or two to finish the second side.

Add pork to onions if you'll serve from the table. At our house, everything goes back into the skillet, and we serve ourselves from there. 

Warm tortillas up with the method of your choice, and fill with pork mixture. Top with sour cream and the garnish of your choice. A great side dish or topper: slightly spicy slaw.


Apr 18, 2012

Places to eat in Wichita: Tanya's Soup Kitchen


Tanya's Soup Kitchen is more than soup: there's sandwiches and salads, too. Everything (except the bread) is made fresh on site, and the dishes all strike a nice balance between the creative and the comfortably familiar. Nothing is run-of-the-mill, but nothing is frou-frou, either. It's nice for our gluten-sensitive friends that they offer gluten-free bread options, and the staff seems to understand the accommodations that need to be made for such folks.

The interior is sunny and open, with a casual cafe vibe. You stand in line to order, and your food is brought to the table.

Today I enjoyed the "Ella," shown at the top of this post. (That's a small. You can also order large.) It's a chicken salad with cashews, dried cherries, and fresh herbs on mixed greens, with your choice of dressing. The dressing on the chicken is very light; no gloppy mayo here. I went with the herb vinaigrette; it was nice and light, with a perfect balance between sweet and tart. The herbs complemented the blend, but no herb was so prominent that it overwhelmed the flavor.

I also got a "small" soup...


...which would be a "bowl" in any other restaurant! Today, I opted for their creamy tomato dill soup. It's so popular, they offer it every day, year-round. And I can see why. It's delish! It's also quite sweet. I'm sure there must be some sugar in there, so for health's sake, I didn't eat the whole thing. But I would have liked to!

Their salads are reasonably priced -- ranging from $3.50 to $7.00 for a small, $4.50 to $9.00 for a large -- but personally, I think their sandwiches are a little overpriced; $9 for whole; $7.75 for half.

Overall, a quite enjoyable lunch!

Tanya's Soup Kitchen website

Tanya's Soup Kitchen on Urbanspoon

Apr 17, 2012

Salmon with fresh tomato-avocado salsa


This is so simple, and so yummy, it's gonna knock your socks off!

The star of this dish is the salsa. It's so delicious! My husband took leftovers of just the salsa to work for lunch today (I made extra) and when he came home, he said, "If you would make some more of that I'd be very, very happy."

I had a bit of leftover salmon with the salsa on it for lunch, too; cold -- straight out of the fridge. It was still good!

This is based on a recipe from All Recipes, but I prefer butterflying and broiling the salmon, to the nuke-and-serve-cold method in the original recipe. Alternatively, you could grill the salmon; that would be fab, too!

You could also substitute basil for the cilantro. In fact, I think I will, next time I make this. I bet that will rock this dish even more!

I used white corn because it's got a little better carb-to-protein ratio, but I think yellow corn makes a prettier dish. NOTE: To make this dish Paleo/Whole30 compliant, just omit the corn.

Recipe: Salmon with fresh tomato-avocado salsa   

Servings: 3-4

1 cup chopped fresh tomato
1/2 Hass avocado, chopped into about 1/4" pieces
1/2 cup corn (omit for Whole30/Paleo compliance)
1/4 cup minced red onion (a fine dice, or slivers)
1/4 cup chopped fresh cilantro (or basil)
1 garlic clove, crushed
1 T. olive oil
1 T. balsamic vinegar
1.25 lbs. salmon fillets
salt and pepper, to taste
olive oil for drizzling


Chop up the tomato, avocado, garlic, onion, and cilantro (or basil). To dice the avocado, you cut through it like this, leaving the skin intact, then scoop it out with a spoon.


If you want more detail, see Simply Recipes' walk-through. (I do NOT recommend the pit removal method they show in step 2b; a woman I know cut some tendons in her hand trying that trick.) 

In a medium bowl, combine all ingredients from tomato through vinegar. 


Refrigerate at least two hours.

Preheat the broiler. Line a baking sheet with aluminum foil.

How to butterfly salmon
The purpose of butterflying salmon is to make it all about the same thickness, so that it cooks more evenly. It also cuts down on oven time.

Put your salmon on a cutting board, skin side down. (Mine is already in the baking pan in these pics, but it will be easier to work on a cutting board; you don't have to maneuver around the rim of the pan.) Start by making a guide mark: in the thickest point of the fillet, use the tip of your knife to mark the spot exactly halfway from top to bottom.


The black line in the pic below shows where your knife will enter; the white dashed line shows where you will cut. The cut should run right through your halfway mark. 


On the thinnest end of the salmon, slide your knife in parallel to the cutting board, and at the same height as your halfway mark. Continue to cut, keeping your knife parallel to the cutting board. Stop about 3/4" away from the opposite edge; do NOT cut all the way through.


If you have been working on the cutting board, move your salmon to the foil-lined pan now. Next, open the sliced salmon up like it's a book, folding the top piece out so it lays former-top-side down.


Repeat with the other fillet(s), season with salt and pepper, and drizzle with olive oil. 


Broil 4-6" from the heat, just till it flakes easily w/ a fork, about 8-10 minutes per inch of thickness. (That is, the thickness after you butterflied it.)


Remove the salmon from the skin; plate in serving-sized pieces; top with the salsa.


Try it, then come back and tell me how much you love it! :)


Apr 15, 2012

Places to eat in Kansas City: Slice Deli & Bistro


On a recent short trip to Kansas City, we decided to try some place different for breakfast. I read about Slice Deli on Urbanspoon: it was rated 95%, and reviewers raved about how great the sandwiches are, and about how they smoke and roast all the meat on site. And given the name, I was expecting something bistro-ish. So we went with high hopes.

Which was a mistake.

Now, given all the positive reviews, I'd be willing to try it again at lunch time. And if you go in with realistic expectations, it would be just fine. (Except for the coffee. More on that in a minute.)

First the atmosphere: The space is bright and clean, with toys and games available to play while you wait. But Slice is adjoined to a convenience store, with a large open doorway between the two, and there is no change in ambiance from one to the other. "Deli" is an appropriate description. "Bistro" is not.

My husband and I both ordered "The Beater:" two eggs any style; two slices of bacon, sausage or ham; hash browns and toast. I thought the sausage and eggs (which I ordered over medium) were perfect. The hubs considered the sausage overcooked. The toast came without butter -- and without an offer of butter from the waitress -- and there was none sitting out. The hash browns were perfectly adequate.

I'm not a big coffee drinker, but my husband is. Big coffee snob, really, if we're going to be honest here. He grinds locally-roasted Sumatra beans every morning, and perks it in a French press. Get the picture? He described the coffee at Slice as "the worst coffee I've ever had anywhere." Given that ringing endorsement, I didn't try it, so I can't give the alternate opinion. If coffee is coffee to you, you might think it's perfectly fine. If you're a coffee connoisseur, you might want to skip it.

So the bottom line is: go for lunch, go in with reasonable expectations, and if you're picky, skip the coffee.

Slice Deli & Bistro on Urbanspoon

Apr 13, 2012

Individual peanut butter pies


(Note: this is a re-post, but I have added photos of the process and shot much better pics of the finished product. Amazing how much my photography has improved in a few months!)


This dessert is simple, decadent, and sugar free! Okay, if you add some chocolate on top -- and you really should -- there's a marginal bit of sugar. But for an occasional or special treat, this is a really satisfying way to get a very small amount of the sweet stuff. Sweet, and creamy, and rich -- oh my!

If you want the crunchiness of a pie crust to contrast with the smooth fluffiness of the peanut butter, add a layer of chopped peanuts or cashews, either in the bottom of the dish or between the PB and the whipped cream.

You are going to top it with whipped cream, aren't you?

My favorite way to serve it is in little mason jars, but you could also use dipping bowls, ramekins, or fancy-schmancy little individual footed trifle dishes. 

Peanut Butter Pie

1.5 cups heavy cream
8 ounces cream cheese
1 cup peanut butter
1 Tablespoon vanilla
your sweetener of choice, equiv. to 1/4 cup sugar
optional toppings: chopped semi-sweet or dark chocolate, peanuts or cashews; sweetened whipped cream

In a medium mixing bowl, whip heavy cream until fluffy peaks form.


In a second bowl, beat cream cheese until soft and creamy. Add peanut butter, vanilla, and sweetener and continue beating for an additional 2 to 3 minutes or until fluffy and airy.


Drop three large spoonfuls of the PB mixture into the whipped cream; whip this till mostly incorporated.


Add the rest of the PB mixture in the same way...


whipping just until it's all a consistent color.


Taste. Taste again. Okay, now stop. No, stop!

No, seriously: taste it, and if you won't be topping it with sweetened whipped cream and/or sweet chocolate, add more sugar/sweetener if it's not sweet enough for you. (Now that I'm adjusted to living without sugar, I'm more sensitized to the taste, so I tend to under-sweeten things.)

Dollop the pie filling into individual small bowls, ramekins or mason jars. Cover with clear wrap and refrigerate till ready to serve. (Optional method: put some chopped chocolate and/or chopped nuts in the bottom of the jars before filling.)


Chop the chocolate.


You may set out toppings and let your guests top as they like, or prep it all and serve.

Taste. Swoon. Repeat.


Here's nutritional info, based on 8 servings, no toppings, and using Splenda for the sweetener. (Via myfitnesspal.com)

Nutrition Facts, Per Serving
Calories 388
Total Fat 41 g
Saturated Fat 26 g
Monounsaturated Fat 11 g
Polyunsaturated Fat 2 g
Trans Fat 0 g
Cholesterol 123 g
Sodium 256 mg
Total Carbohydrate 2 g
Sugars 0 g
Protein 3 g

Popular Posts