Dec 29, 2012

Homemade Playdough (aka Play-Doh)


I'm thinking about using playdough as an object lesson in an upcoming teaching session, so I was googling it and found a recipe billed as "The Perfect Home Made Play Dough Recipe!" Although the first (and second) time the author tried the recipe, she thought that "cream of tartar" was tartar sauce. Which, as you can imagine, did not have stellar results!
I haven't tried this, but if I do, I'll update with the results.

photo credit: qwrrty via photopin cc

Dec 26, 2012

Bread pudding: the ultimate Christmas dessert!

photo by The Shiksa in the Kitchen

So, I'm fixing dinner, Christmas Eve night, and my husband says, "What are we having for dessert?" Oh my gosh -- dessert?! How on earth did I forget dessert? (I'll tell you how: I was thinking of the waffles and cinnamon rolls we were going to be having for brunch the next day!)

Then my brilliant husband goes on to say, "How about bread pudding?"

Now, if you're  not a bread pudding fan, let me tell you -- neither was I, until a couple years ago when we ordered lemon bread pudding at Carrabba's. I love anything lemon, but I'm telling you, this was heaven on a plate! Warm, sweet but with a little lemon tang, and custard-y... yum!

So a more traditional bread pudding -- simply flavored with vanilla, cinnamon, and for those who like them, raisins -- seems like the perfect Christmas dessert.

And it was!

It's quick and easy to throw together, and uses ingredients you probably already have on hand. We used this bread pudding recipe from All Recipes, and topped it with the Kahlua cream sauce recipe from The Shiksa in the Kitchen. (A plain vanilla cream sauce would be good, too. Orange or maple might be nice for a breakfast/brunch version.)

With these slight changes:
- Used a demi-loaf of French bread; fresh, not day-old.
- Used a 9x9" pan (rather than 8x8")
- Used brown sugar, not white.
- Left out the raisins.
- Added a little fresh-grated nutmeg with the cinnamon.
- Skipped the melted butter, but drizzled a little heavy cream over it (after pouring on the egg mixture, but before baking' I didn't measure, but probably about 3 Tablespoons.)
- Sprinkled some pecans on top. (Next time I'll use more and mix 'em in.)
- Baked for 35 minutes.

Mmmm... Imagine the warm, sweet aroma of vanilla, cinnamon and nutmeg, with a texture I can only describe as a tender, custardy cake. If this isn't Christmas on a plate, I don't know what is! But it would be just as good at any autumn or winter dinner -- or brunch!

I might just make it again for New Year's Eve!

Dec 2, 2012

12 homemade Christmas treats that aren't sweets

If you LOVE to make homemade food gifts, but have some giftees who are diabetic, gone paleo, eating low carb, or just not sweet lovers, here are some DIY food options for them:


A sugar-free dry rub for rotisserie-style chicken -- highly rated on AllRecipes.com.


Garlic hummus (from yours truly). I suggest gifting this with some homemade seasoned pita chips.


My buttermilk ranch dressing: No nasty chemicals, no sugar, made with yogurt.


Personalized coffee blend, from Martha Stewart. This page includes a downloadable printable for the label. Of course!


I'm not a fan of olives (so don't make this for me), but for those who do like them: olives with fennel seeds and orange, from Martha Stewart.


Fajita marinade for steak or chicken, using Pioneer Woman's "Beef Fajita Nachos" recipe.


Giada's marinara. Gift it with a package of cheese tortellini and/or homemade garlic bread. (Not low carb or paleo, I know. But better than store-bought!)


Pickled red onions. These make a beautiful jarred gift. They're a delicious addition to salads and sandwiches. Fancy-up your green beans or sweet peas instantly. Some folks like them atop a hamburger or roast.
And when the onions are gone, you're left with a lovely pink vinegar to use in slaw or salad dressings.
Feel free to improvise on the sugar and spices. I'd use half this much sugar, and just a few generous pinches of thyme and some fresh-ground black pepper.
(A note to diabetics and low-carb-ers: This is one recipe where I'd go with sugar, honey or maple syrup over artificial sweeteners. Splenda doesn't always work well with vinegar, and if you're using these as a condiment, the amount of sugar actually ingested is very minimal.)


Homemade taco seasoning. No sugar, no MSG, no gluten, no cornmeal filler.


And for a baker's dozen, the last item is a sweet, but it's sugar-free, and not very sweet-tasting: sugar-free chocolate bark with your choice of toppings.

Oct 31, 2012

Homemade olive oil butter spread

olive oil butter spread
photo by Kitchen Simplicity

I recently got some not-so-great news about my cholesterol, so I'm trying to cut back on dairy fat. We use real butter -- I always trust a "whole food" more than a food full of man-made chemicals -- but still, it is dairy fat. So I was happy to see this recipe from Kitchen Simplicity, which replaces part of the butter with healthy, monounsaturated, Omega-3-rich olive oil! 

I tried this afternoon. It's quick and easy to whip up, and it is nice and spreadable straight out of the fridge, like margarine. She says it doesn't taste like olive oil once you spread it on toast. I disagree, so I wouldn't use it for cinnamon toast. But with the strong influence of Mediterranean tastes in Wichita restaurants (mostly Lebanese), it's not unusual to be served bread before a meal with a dipping sauce of olive oil and zahtar (or za'atar) seasoning, so when I tasted this spread on whole wheat toast, that's what I thought of. And I just happen to have some in the cabinet, so I sprinkled a little on. Mmm!

Olive Oil Butter Spread

  • 1 cup softened (not melted) unsalted butter
  • 2/3 cup extra virgin olive oil
  • 1/4 teaspoon salt (or half this, if using salted butter)
Whip butter until loose. Slowly beat in olive oil, scraping down sides of bowl occasionally, until fully incorporated and smooth (mixture will be runny). Beat in salt. Pour into storage container and refrigerate until set.

Here's the original post from Kitchen Simplicity.

Oct 11, 2012

How to reorganize a kitchen, Part 3

First, read Part 1 and Part 2.

Enough with the mental exercise; let's get down to business!

Pull and give away. Pull out the Zone 4/purge items and give them to a young person/couple who's just setting up house. My DD just moved into her first apartment, so I compiled a nice pile of stuff for her to go through. She's home this weekend, and was only too happy to take my mini loaf pans and pumpkin carving tools. If you don't have someone to give away to, or after they're done picking it over, load all that stuff up and take it to Goodwill, DAV, or Sally Ann's (my MIL's boutique nickname for the Salvation Army store). You won't believe how great it feels to drive off, leaving that clutter behind! (Update: Here's a great idea via Apartment Therapy -- swap stuff with neighbors or friends. Just make sure you do more dropping off than picking up!)
     Oh, and if you're also tossing trash and recyclables while you pack, get two different colors of trash sacks, and consistently use one color for each type of waste.

Pull and pack. Whether or not you're actually moving, it would be ideal if you could set up some table space in or near to your kitchen where you can lay everything out. Pull out all the Zone 2 & Zone 3 stuff (leaving the Zone 1 stuff, 'cause you need it every day, right?). Then give it another assessment: Have you discovered more stuff you don't really need? Add it to your give-away stack.
Now, start grouping together things that you use together. Extra dishes that I use for large dinners can be packed with the linens or holiday table decorations that normally get pulled out at the same time, for example. Another idea: my soup ladle is bigger than anything else in my spoon-and-spatula canister that I keep out on the counter, and I rarely use it unless I'm making a big pot of something, so now I store that big soup ladle and my big soup pots together.
     If you're moving, start packing up the Zone 3 stuff first, because you can live a couple weeks without it. LABEL EVERY BOX CLEARLY! Write on the box a good description of its contents. Here are some nice looking labels for moving -- free printables!
     Why detailed labeling? Your Zone 3 stuff may not get unpacked for a while, so a few months later, when you're ready for a big gathering, you might not remember whether "glass stuff" means extra drinking glasses, or glass cake stands.
      Repeat the process with the Zone 2 stuff. Resist the urge to mingle the two if you have partially-filled boxes. Whether your reason for this is downsizing or a more efficient kitchen, these zones will start to make more sense once you begin unpacking and putting away.

By the way, where to get good, free boxes... Liquor stores are always a great bet. They get shipments in frequently, and the boxes are made to hold multiple glass bottles of liquid, so they're good and sturdy. If you stop in one and ask for boxes a few days before you'll actually need them, they may be willing to save them for you over several days. Be sure to say thank you! Another source is friends or family members who work in a place that receives regular shipments and normally breaks the boxes down for recycling. Your local craigslist or freecycle is another great source.

Next installment: Zone 1, and your moving-day kitchen kit.

Oct 7, 2012

How to reorganize a kitchen, Part 2

Or, questions to ask yourself when you're trying to downsize.

If you haven't already, read Part 1 of how to reorganize a kitchen. It's a fundamental step, and it's super easy!

In theory, at least...

When it gets down to reality, though, it can be kind of tough to let go of some items, even if you rarely use them. So here is a progression of questions to ask yourself when you're standing there with a widget in your hand, wondering whether to keep it or give it away.

Find this collection on Etsy at http://www.etsy.com/listing/102475691/empeco-bread-box-siftervintage-kitchen

Let's start with the practical:

  • When was the last time I used this?
  • What are the odds that I'll use it within the next six months? Name a percentage.

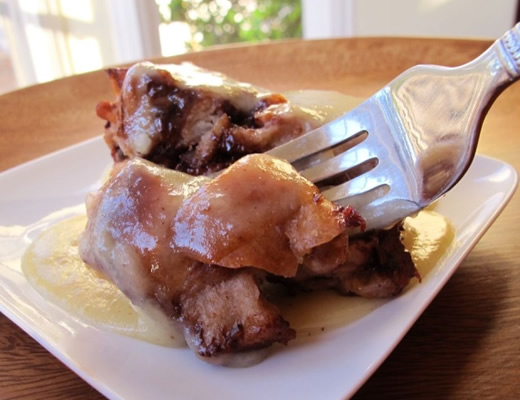
If you can't remember the last time you used it, then you're not keeping it for a practical reason, you're keeping it for an emotional reason. (More on that in a minute.) If you won't use the thing more than once or twice a year, then you might want to question whether you really need it. Exceptions may be made for special holiday traditions that you and your family truly treasure. For example, we always have homemade waffles with mixed-berry sauce on Thanksgiving and Christmas mornings, and once-in-a-blue-moon just because.

My kids (now in college) love that and look forward to it. It makes no sense for that waffle maker to be taking up space in my kitchen for the 363 days that it doesn't get used. Still, it's a beloved tradition, so I pack the thing away in a box in the basement, and pull it out just when we'll want it.

(No, that's not my photo, and no, I don't put sprigs of mint on our Christmas morning waffles. Or anything else, ever. But the sauce looks kinda like ours. Thanks, Taste of Home.)


Now, to identify those things that you don't really use, but are keeping for an emotional reason. Try asking...

  • Does it represent a happy memory? Or does just seeing it make you smile?
  • Would you feel guilty getting rid of it because Great Aunt Sadie brought it over from the old country?
  • Does it represent me being someone I wish I were, but really am not?

If you're just keeping it because you have some happiness attached to it, and if you have room for it, keep it!  Put it out on display (not buried in a drawer) and enjoy it. If you don't have room for it, however, consider getting a nice photo taken of it, and frame a small picture of it to keep in your kitchen where you'll see it often.

http://www.thefancy.com/things/268828651/Vintage-Teapot

If you're keeping a thing just because it belonged to some ancestor, let me share some advice that an older relative gave me years ago which was incredibly freeing. I was debating what to do with an old ornate table that had been my grandma's, but that I wasn't particularly fond of. This woman -- who collected antiques and was very into family history -- said, "If you don't love it, don't keep it. You have other ways of remembering your grandma." Which is absolutely right.

Okay, how about those things that represent some past hopes you had, or someone you once wanted to be. Say, cookie cutters that you envisioned sharing with your kids at Christmas cookie-baking time -- only to discover that they had no interest and you had no patience! Let it go! Be free! You have other ways to count your success as a baker, wife, husband, mother, etc.

I recently let my sewing machine go for this reason. I used to sew pretty often, and I still think of projects I'd like to do, but honestly, I really only go at it about once every three years. I had to come to grips with the fact that I am no longer A Person Who Sews. But that's okay. I am now A Person Who Works From Home, and A Person Who Volunteers, and A Person Who Walks the Dog (Almost) Every Day, which I wasn't before, so it's not like I'm becoming nothing by giving up this one aspect of myself.

Still having a tough time letting go of some things? Here are a couple more questions to ask yourself:

  • How tough or expensive would it be to replace this if I really do need one again in the future?
  • Is there someone else who might get more use and enjoyment out of this than I am?

In regards to that last question, I learned an important lesson from three people: Oswald Chambers, and my parents. In his classic book of devotions, My Utmost for His Highest, Chambers talks about keeping things for ourselves for so long, they become spiritual dry rot. He was speaking of spiritual blessings, but I think it applies to material things, too. When disassembling my parents' belongings for their estate sale, there were so many things they held on to for so long that the stuff had become worthless. If they'd given away that TV or those clothes or that sofa when they first realized they didn't need them, someone else might have enjoyed and been blessed by a few years' use of the goods. Instead, the stuff sat in storage until it was so outdated or decayed that it was only fodder for the dumpster. Now, I try to look at items I'm keeping but not using -- whether kitchen gear, clothing, or books -- and ask, "Am I depriving someone else of the use and joy of this item by hoarding it for myself?"

I hope these questions are helpful to you. Next installment we'll get down to sorting and packing!

Oct 3, 2012

How to reorganize a kitchen, Part 1

Because we recently moved to a house with less kitchen storage space, I had the perfect opportunity to re-think and reorganize how and where I store things in my kitchen. Whether you're downsizing, moving toward a more minimalist lifestyle, or just want a more efficient use of your small kitchen (or large one), you might want to try this approach. If you're doing this without a move forcing you to pack anyway, you might need to set aside an entire day or two -- depending on your stuff and your cabinets -- to disassemble things and put them back in a new, improved storage scheme.

Here's the first step -- and it's pretty easy:

Think and write. Think through what you have and how often you use it. First, off the top of my head and then, walking through my kitchen looking in cabinets, drawers, counter and pantry space (and hall closet, since some of my kitchen storage overflowed there over time), I broke my kitchen tools and equipment down into three four zones:
     Zone 1: Things I use every day or every week. For me, this was things like frying and sauce pans, sheet pans, measuring cups and spoons, knives and cutting boards, some of my spatulas, one set of mixing bowls, the hubby's coffee stuff, spices, and so forth. Also included in this is just enough everyday dishes to work for the two of us between dishwasher runs.
    Zone 2: These are things I pull out a few to several times a year: when we have more than a couple people over for dinner (extra/nicer plates, cloth napkins, bread baskets), or when I'm making something I don't make often (muffin tin, pizza pans, bread machine, etc.)
   Zone 3: These are the things I only pull out for large gatherings: All of the extra plates and silverware, large serving platters, crock pots, extra coffee cups and glasses. Also in this group is the stuff that's special and seasonal: waffle iron, dehydrator, extra-large soup pots.
   Zone 4 - Purge: Every kitchen could benefit from the occasional purge. Whether it's equipment for a hobby you no longer practice, or a gadget you thought you HAD to have that hasn't seen the light of day in years, everyone has some kitchen stuff they could jettison. For me, this included some cake decorating stuff, half a dozen small tart pans, stoneware cookie molds, and a plastic lettuce knife. (Really?!)

In Part 2, I'll explain how to start breaking down your kitchen contents into these zones, along with some packing and re-thinking tips.


Sep 24, 2012

Yes, sugary drinks interact with weight-related genes (and how to kick the pop habit)

This AP photo shows how many cubes of sugar are in popular soft drinks.

The Associated Press reports that "A huge, decades-long study involving more than 33,000 Americans has yielded the first clear proof that drinking sugary beverages interacts with genes that affect weight, amplifying a person's risk of obesity beyond what it would be from heredity alone." Full story here.

Are you hooked on pop? Here's a "baby steps" approach to weaning yourself off the sweet stuff. Try taking one or two weeks to adjust to each step.


  1. Switch to diet pop, same amount. Update, 9/28/12: If you have a serious sugar addiction, you may need to do this step in phases. See this article for info about sugar withdrawal symptoms and how to manage them.
  2. Replace one pop a day with coffee, tea or juice. No added sugar or artificial creamers. You may use other sweeteners. Do some research and experimentation to find a sweetener that you feel is healthy, and that doesn't cause any troubling side effects for you. 
  3. Continue replacing servings until you are off pop completely.
  4. Replace one drink a day with water or green tea. Flavor with real fruit or a splash of juice, if you want. (Note: if you’re going off of coffee or strong tea, you’ll need to do the replacement slowly to avoid caffeine withdrawal symptoms such as headaches and sluggishness.)
  5. Continue replacing until water is all you drink all day (with fruit, if you like). Or green tea till 3 pm; water after.


Aug 31, 2012

Can I put coffee grounds on my plants?


That's the question I was asking myself this morning. Specifically, my potted basil. A little googling found me a thorough and thoroughly tested answer -- not something you can always depend on, on the interwebs. Here's an excerpt:
Nutrient content? ...The kind of coffee grounds a typical homeowner would produce or obtain are around 1.5% Nitrogen. There’s also a lot of Magnesium and Potassium, both of which plants really like; but not a lot of phosphorus (the “fruiting and flowering nutrient”) or calcium, a mineral that many plants crave, and whose lack helps explain that recalcitrant acidity. (“Lime” is essentially calcium carbonate, and wood ashes are also very high in calcium....)  
So mix those coffee grounds in with some lime or wood ash and then into lots of shredded leaves; you’ll make a fine, high-quality compost. The only exception I can think of is our listeners out West cursed with highly alkaline soil; you could try tilling in some grounds alone and see if it moves your nasty soil towards neutral with no ill effects. 
Otherwise, we can’t recommend their raw use; the acidity could be high enough to damage even acid-loving plants.
Read the full article here.

Aug 28, 2012

Buttermilk Ranch Dressing Recipe


Looking for things to do with summer's last abundance of garden tomatoes? When you're tired of BLT's (is that possible?), this is one delicious way to serve up the same flavors with a twist.

This recipe is based on Ina Garten's (aka Barefoot Contessa) buttermilk ranch dressing. I'm not saying I could improve on her: these changes were just made to accommodate my being short on fresh basil, my husband's aversion to too much mustard flavor, and our taste for less salt in things. Also, I prefer the taste of yogurt to that of mayo, so I tweaked that proportion a bit.

I loved how it came out! I ate this salad or some variation of it for four days straight! I hope you'll love it, too.

Recipe: Buttermilk Ranch Dressing

3 green onions, white and green parts, chopped
2 T. chopped fresh basil leaves, lightly packed (or 2 t. dried)
2 T. freshly squeezed lemon juice
2 t. Dijon mustard
1 T. good olive oil
2 garlic cloves, chopped
1 t. kosher salt
1 t. freshly ground black pepper
1/2 cup mayonnaise
2 cup Greek-style yogurt
1/2 cup buttermilk, shaken
----
3 small Bibb lettuces, cut in half through the core
   (or 6 hearts of romaine, cut in half through the core, or equivalent loose-leaf chopped)
2 large ripe tomatoes, cut in large cubes, or smaller tomatoes thickly sliced
1 red onion, sliced (optional)
bacon, amount to your liking (optional, but highly recommended)

Place the green onions, basil, lemon juice, mustard, olive oil, garlic, salt, and pepper in the bowl of a food processor fitted with the steel blade. Puree for 15 to 20 seconds to make a smooth mixture. Add the mayonnaise, yogurt, and buttermilk and blend until smooth. Transfer the dressing to a container, cover, and refrigerate for at least 1 hour, for the flavors to develop.
Arrange the salad ingredients on salad plates and drizzle with the dressing. Sprinkle with fresh ground pepper if desired, and serve.

Serves 6.


Aug 9, 2012

Tips for Organizing Your Fridge


Apartment Therapy recently posted an article on "How to Organize Your Refrigerator." I thought most of their tips were fairly obvious, though. ("Rearrange the shelves: Arrange them to suit how you like to keep things..." Really? Don't most people do that?)

However, there were some gems in the comments. I've collected a few here for your organizing pleasure!

"I keep a notepad on the fridge door for us to list the fridge staples as we use them up. No more memory work when I make the next grocery list. The list is already started for me." - Cathryn @ Caro Interiors. Note: Again, this may be obvious to most people, but if you're not doing it, you should. Especially in a household with more than one person, so that when the non-shopper uses the last of the soy sauce, the shopper knows to get more. We use a dry erase board. If I'm rushing out the door in a hurry and have forgotten to write the list out, I take a photo of the list with my cell phone.

"One thing I use that works very well is using a lazy Susan for jams, salsa, pickles etc." -- Dulcibella

"I have a neat trick for filling the refrigerator which also works for dishwashers. Look at the appliance product photos for the best place to put drinks, casseroles, cheese, veggies, meat, and shelf alignment. The manufacturer spends lots of time and money developing an efficient way for the appliance to work. Now everything stays well organized and seems to be in the right place, veggies not too close to the refrigeration, etc. The same can be done for filling your dishwasher [for best cleaning results]."  -- Funstraw

"You might find Fridge Binz helpful. The Container Store has some of the larger ones." -- LDYLSTAT  Note: I started doing this in my freezer a couple months ago, just using cheap bins from the dollar store. I have one for meats and fish, one for fruits and one for veggies. It's amazing how much easier that one little thing has made finding stuff in the freezer!

"I put all the salad dressings in a cardboard beer six-pack caddy (recycling!). It's handy for putting on the table and I won't buy anymore until a space opens up." -- Meecee

"Speaking of organizing condiments in leftover six-pack containers... I really geek out and match the beer brand to the condiments. For instance, I'll use a PBR box to corral ketchup, mustard, steak and barbeque sauce. For items like soy sauce, sesame oil, fish sauce, and siracha, I'll use Tiger or Kirin. And Peroni boxes are great for jars of sundried tomatos, roasted peppers, balsamic vinegar, and pesto. It makes it easy to grab everything you need for whatever your cooking. Grilling out? Reach for the PBR box. Making stir fry, that's the Tiger box. Cooking burritos? Grab the Coronas box." -- Shannanigans  Note: If I drank beer, that is something I would totally do! Yeah, I'm geeky like that.

"This might sound like an ad but my aunt sells Tupperware brand and the Fridgesmart boxes are awesome! They come in different sizes and keep veggies fresh longer!" -- VintagePearl

"A habit [I got] from my Mother is reusing glass jars instead of buying plastic. Prechopped garlic/ginger jars are a great size for mini leftovers. Before there was green, it was called frugal." -- JSSPHAN

"I recently figured out how to keep from freezing salad in my counter-depth fridge. I keep it in a compartment in the door. If I use the one that was designed for gallon jugs of milk, I can fit the Costco sized salad box in there and it stays cold without being so close to the cold air vents that it freezes." -- EngineerChic


"I use these stacking bins in my fridge; they keep me from forgetting about items that might otherwise get pushed to the back of the fridge. I also use them in the pantry, and stack them with things like tea, onions, etc." -- Liz30

"I like to use a plastic box from the dollar store to put all of my sandwich fixins' in. It is so easy to pull the whole thing out and slide it back in in one swoop, rather than gathering up the mayo, half a tomato, head of lettuce, cheese and lunchmeat and making multiple trips to get it out and put it all away. My husband and I were just discussing starting a home salad ba: prechop all of our favorite salad toppings and put them into some kind of divided container to encourage easy, fast salad lunches." -- WonkyOne15

For several roomies sharing a fridge: "Give each roomie a different brightly-colored basket. Add a white basket for anything that is a free-for-all & ok to be shared. Of course, you must still depend on the *honor system* but I found the visual reminder meant less missing food less often. Good luck with that. (Hey, i once resorted to storing my breakfast yogurt in a small plastic toolbox & a tiny padlock. Sad but true)." -- Discerning

"My mom had a good fridge organizing plan: if anything was on the bottom shelf of the fridge, we were not allowed to use it, she was planning meals with it or it was for company. Simple rule: bottom shelf = don't even touch it." -- Therese Z

Here are some other fridge organizing resources:


Before and After: A Refrigerator Make-over at RealSimple.

Step-by-step Process to a Clean, Well-Organized Fridge at About Working Moms.

A really thorough cleaning and organizing walk-thru with lots of pics at One Good Thing by Jillee.


Aug 8, 2012

Happy "Sneak some zucchini onto your neighbor's porch" Day!

And what to do with said zucchini (or summer squash) if you're the lucky recipient.

Whether it was you or your neighbor who planted too much zucchini this year, here are a few recipes for using up that infamous garden bounty. (Summer squash is its yellow cousin; no significant difference in taste.)


Pizza bites. They are cute; also the perfect size to pop in your mouth whole. Easy, gluten-free appetizer or snack.


Summer squash (or zucchini) topped with sausage and cheese. A quick easy dish to prep ahead of time, and then assemble and cook in about 15 minutes.


Zucchini noodles with peanut sauce. Quick-and-easy, low carb, and tasty, too!

For those who are looking for something sweet, and aren't trying to avoid flour, here are a couple recipes for you. 


Elise's Grandma's zucchini cake with cream cheese frosting! This sounds like carrot cake -- one of the few cakes I will always be willing to blow my diet for! I haven't tried this recipe, but it's from SimplyRecipes, and every recipe I've ever tried there has been a winner. I'm sure this one is no different.


Zucchini bread. If you've never tried zucchini bread, you really must! It's a sweet quick bread (read "muffin-like"), akin to banana bread, but without the banana overtones. You really don't taste the zucchini at all; it just lends moisture to the party. The predominant flavors come from the cinnamon and sugar. And you know that can't be bad! 
       I made this recipe from AllRecipes earlier this week to take to a ladies social, because it was rated five stars after more than 3,800 reviews! And it was a hit with everyone, but it's a little sweet for me as is. If you are, like me, living a mostly sugar-free life, you might want to cut back on the sugar by 1/4 to 3/4 cup. (Here's a healthier version I haven't tried.) 

Jul 29, 2012

How To Peel, Cut, Core, and Dice: Tips for Fruit and Vegetable Prep


The Kitchn has compiled a super-handy list of 20 tips and how-to's for prepping various fruits and vegetables. Some of the more interesting entries:

How to peel a head of garlic in 10 seconds. Two bowls, a solid surface, and you're 10 seconds away from a bunch of naked garlic cloves.
How to peel roasted red peppers.
How to cut a mango.
How to dice an avocado.
How to dice an onion.
How to core a head of iceberg lettuce.
How to seed a pomegranate.

See the full list of 20 items.

Jul 27, 2012

BLT's -- without the bread


Once locally grown tomatoes are in season in Kansas, I always start craving BLT's! (Bacon-lettuce-tomato sandwich, for any poor souls who are unacquainted with this little bite of summer.)

I made some homemade bread last week just for this. Added some smoked turkey to punch up the protein. But to keep my carbs and proteins (sort of) in balance, I limit myself to one piece of bread per meal. After devouring one delicious BLT -- ripe, sweet juiciness of the tomato contrasting with the salty crunch of the bacon -- I wanted more! Looking hungrily at the remaining tomatoes and bacon, I wondered if the bread were really necessary.

So I took a bit of romaine, smeared it with a little mayo, and topped it with tomato and bacon. Added a slice of avocado to some of them. Oh yeah! It's all the best flavors and textures of a BLT, without the carbs! Perfect for the gluten free, low carb, Paleo or Whole30 diet. They'd make a great snack or appetizer, too.


A couple notes to make them healthier: choose nitrate/nitrite-free bacon; look for a mayo that contains no corn syrup. Or make your own! I like this super-easy 4-ingredient mayo recipe.

Jul 25, 2012

The cookie thief

A few days ago, my dear daughter made a batch of oatmeal cookies, and at my request, put pepitas in them; roasted, salted, dehulled pumpkin seeds. I like the little extra crunch and subtle saltiness they add. (And I love having my DD home, but it does make it harder to kick the sugar monster!)

I had set up a few cookies in my high tech studio (aka, a bench from the kitchen table, pulled up close to the sliding glass door so as to catch some indirect sunlight). I stepped away to get something from the office, but when I came back something wasn't quite right.


Here's the before:


And here's the after:


Hmm... One cookie seems to be missing. Now, who could the culprit be?


Oh, I just can't get mad at that adorable face!

Jul 21, 2012

Kicking the sugar habit? Here's the most important thing to know.


Sugar really can be quite addicting.  Dr Eric Stice has famously said, “Sugar activates the brain similar to the way cocaine reacts”. I think that those who call it "toxic" are going overboard, though. As Dr. David L. Katz says, "the dose makes the poison." And Americans are definitely over-dosing. On average, American adults eat about 100 pounds of sugar a year. (Source.)

(Click these links for some stunning graphics showing how much sugar and corn syrup the average American consumes in a day, week, month, year and lifetime. Care for a dip in a hot-tub full of corn syrup, anyone?)

I was diagnosed with hypoglycemia in high school, so I was trained early on to stay away from or at least go easy on sugar, but later in life, I got a little sloppy with it. Eventually, between my weight gain, migraines, and moods, I finally realized that I needed to get back to that super-cautious approach to sugar.

Here's a short video by "Mama Natural" with some tips for kicking the white stuff:


I especially want to note this point that she mentions in passing:

Eating sugar creates craving for more sugar. 

Understanding this made a big difference for me. Before I realized this, I might indulge in some sweets a few times a week because, hey, a little now and then isn't that bigga deal, right? But the sweet itself isn't the only cost: it can kick off bigger cravings one or two hours later, and depending on your vulnerability, those cravings might last for days. As I've made clear before, I do believe in the occasional indulgence for very special occasions. But when I do, I know I've got to get back on the no-sugar horse the very next day and tough out the cravings until they subside.

The great thing is, the reverse is also true. The more you stay off of sugar and other white carbs, the more your cravings will subside. The first week or two is gonna be tough, but after that it gets lots, lots easier. If you are physically addicted to sugar, you may need to do a slower withdrawal in order to manage bothersome side effects. For more info, see this article on how to get through sugar withdrawal.

So if you're trying to punt the sugar monster, hang in there! You'll be glad you did!


* Find Just Me(gan)'s blog at http://tallydogs.wordpress.com/

Jul 12, 2012

10 snacks you thought were healthy -- but aren't


Bon Appetit recently published a list of snacks that have a "health food aura" about them, but are either not all that great for you, or are downright unhealthy.

Granola. Eye the ingredients, and pay attention to the carb-protein ratio, and the amount of fiber. Some of these are really no better than sugar-coated cereal.

Smoothies. If not made at home with wholesome ingredients, these are usually sugar- and calorie-bombs.

Low-fat cheese. This is interesting: a study out of Harvard has identified a natural substance in dairy fat -- yes, fat -- that may substantially reduce the risk of type 2 diabetes.

Fat-free salad dressing. These are almost always crammed with extra sugar and/or corn syrup to make up for the texture and flavor lost to fat. Once you make your own salad dressings, you'll be amazed at how easy it is and you'll never go back to store-bought! A few of my faves:
- Creamy balsamic vinaigrette (This page also includes the easiest recipe ever: 1-2-3 Dressing.)
- Ginger-peanut dressing
- Almost-Panera's Asian dressing
- Easy Tex-Mex: equal amounts of Greek yogurt and salsa, then a bit of taco seasoning - easy and delish! See my make-ahead Tex-Mex salad.

Rice cakes. Fairly void of any decent nutrients, they're really just empty calories. Chocolate or cinnamon ones are just empty calories with sugar added.

Pretzels. Proof that "fat free" doesn't equal healthy. They're basically white bread with an egg wash and a bunch of salt.

Veggie burgers. They sound inherently healthy, but frozen veggie burgers can contain more processed filler ingredients and sodium than actual vegetables or beans.

Diet sodas. Sweeteners may increase sugar or carbohydrate cravings, and if consumed in great quantity, may actually impact weight gain.

Others on the list: Bran muffin. Whole-wheat wrap. (See the original article.)

See my lists of ways to sneak healthier choices into your snacks and meals.


Jul 4, 2012

Ina Garten's "guacamole" salad

The recipe is Ina's; the photo is mine!

Looking for a quick, easy dish to take to a Fourth of July party today? This is it! You can whip it up in about 10 minutes, and although it might taste better if it sits for a bit, you can serve it right away. And because it has no mayo, you don't need to worry about it sitting at room temp for a few hours. Perfect for a potluck, barbeque or picnic! Plus, it's just chock full of healthy stuff, and has no sugar in the dressing!

The recipe is from Ina Garten, and although she calls it "Guacamole Salad," I think of it as avocado salad.

I do make a few minor tweaks. Being the spice wimp I am, I leave out the jalapeno and cut back on the cayenne. But I also add in some chopped cilantro. And after making it the first time, I think I'll double the avocado next time.

It's so yummy, I could eat it straight out of the bowl. For lunch. And I have!


Strawberry Pretzel Salad - sugar free, gluten free, without CoolWhip!


Ever since I saw the recipe for Strawberry Pretzel Salad at MyBakingAddiction, I've wanted to create a sugar-free, lower-carb version. It took a couple tries to get the proportions right, but here it is!

Why is it called Strawberry Pretzel Salad instead of Strawberry Pretzel Dessert, or Strawberry Pretzel Pie? It seems that back in the days when Jello was a new-fangled thing, anything that combined jello with fruit was labeled "salad." And this is an old-timey recipe. The fact that it's survived tells you it's good! (Unlike one of my mom's favorite jello salads, which featured grated carrots in orange jello, topped with cream cheese and grated cheddar cheese. Bleck!)

To imitate the crunchy, salty crust without using actual pretzels, I went with a combination of chopped nuts. Specifically, pecans and salted pepitas. Pepitas are pumpkin seeds that have been dehulled and roasted. All of the pepitas and some of the pecans get a coarse chop, while the rest of the pecans get finely ground. The large nut pieces provide the kind of crunch you'd get from the larger chunks of pretzel, while the finely ground pecans serve as the butter that helps everything stick together. The pepitas have a more delicate crunch, while the pecans provide a sort of buttery flavor like the crust of pretzels. You could make this with just pecans, but if you want that salty kick, you'd need to add extra salt to the recipe.

You can use either 4-oz. Mazon jars -- or any other 4-oz. dish -- or 7-oz. ramekins; your serving number will vary accordingly. The neat thing about using Mason jars is that if a guest is too full for dessert, you can pop a lid on their jar and send it home with them! Lidding all the jars would also be handy if you're transporting your dessert somewhere and need to stack them. Perfect for a picnic or potluck!

Update: Thanks to questions by readers, I've now included the nutrition count at the end of this post. This dessert is certainly not NO-carb, and it does have far more carbs than protein, but it's still a lower carb recipe than the traditional strawberry pretzel salad. And sugar-free and grain-free!

Strawberry Pretzel Salad/Dessert

Fills 21 4-oz Mason jars, or 10-12 ramekins.


2/3 c. salted pepitas, chopped coarsely
2/3 c. pecan pieces, chopped coarsely
1 c. pecan pieces, ground fine
1/4 t. kosher salt
30 pkts. Splenda (or 1.25 c. granular Splenda) (OR LESS)
2  8-oz. packages cream cheese, room temperature
1 teaspoon pure vanilla extract
1 c. whipping cream
1  0.6-oz. package sugar-free strawberry flavored gelatin
2 cups boiling water
1  16-oz. package frozen sliced strawberries - no sugar added

Chop the pepitas and the smaller portion of pecans until they are mostly pea-sized and smaller. Grind the larger portion of pecans until they are beginning to stick together. (For method, see my recipe for lime cheesecake shooters.)

The pepitas, before and after:


And the pecans, finely ground and coarsely chopped:


Combine the nuts and salt, and stir until well mixed. 


Place 2 T. into each 4 oz. mason jar (or 1/4 c. into each 7 oz. ramekin). Tamp down lightly using a clean bottle or jar that's smaller than the opening of your serving dishes. (This photo is recycled from a shooter recipe.)


In a medium bowl, beat the Splenda, cream cheese and vanilla until smooth. 


Whip the cream till soft peaks form. Using the lowest setting on your mixer, gently fold the whipped cream into the cream cheese mixture, just until even in color. (Overbeating will turn the cream to butter.) 

Spoon this filling into a gallon-sized baggie and snip off the tip of the bag. You may want to do this in two batches to make it easier to handle. 


A side note... The first time I made these, I thought I'd skip the hassle of using a baggie and just carefully spoon the filling into the jars. Here's the result: on the left is the jar I spooned filling into; on the right is the jar where I piped the filling in. Much neater!


Evenly divide the filling between each jar. Place the jars into the refrigerator for about 1 hour. Placing all the jars in a large cake pan will make transporting them to and from the fridge easier.

After the cream filling is chilled, make the jello. In a medium bowl, stir together the gelatin mix and boiling water. Stir in frozen strawberries. Place the bowl into the refrigerator for three or four minutes. This will allow the gelatin to firm up a bit. 

Evenly spoon the gelatin between each the jars. A small gravy ladle works well for this. 

Also, having the jars in a cake pan while you fill them will save your counter tops from jello stains if, like me, you spill a little.


Place jars back into the refrigerator for at least 1 hour. Serve chilled.


Here's the nutrition count, based on 21 servings, erythritol for the sweetener, (via myfitnesspal.com):

Amount Per Serving; % Daily Value *
Calories 205

Total Fat 19 g 29 %
Saturated Fat 1 g 7 %
Monounsaturated Fat 6 g
Polyunsaturated Fat 4 g
Trans Fat 0 g
Cholesterol 29 mg 10 %
Sodium 111 mg 5 %
Potassium 124 mg 4 %
Total Carbohydrate 14 g 5 %
Dietary Fiber 1 g 5 %
Sugars 3 g
Protein 5 g 11 %
Vitamin A 8 %
Vitamin C 31 %
Calcium 5 %
Iron 8 %
* The Percent Daily Values are based on a 2,000 calorie diet,


Follow Me on Pinterest

Blog Archive

Popular Posts