Oct 31, 2012

Homemade olive oil butter spread

olive oil butter spread
photo by Kitchen Simplicity

I recently got some not-so-great news about my cholesterol, so I'm trying to cut back on dairy fat. We use real butter -- I always trust a "whole food" more than a food full of man-made chemicals -- but still, it is dairy fat. So I was happy to see this recipe from Kitchen Simplicity, which replaces part of the butter with healthy, monounsaturated, Omega-3-rich olive oil! 

I tried this afternoon. It's quick and easy to whip up, and it is nice and spreadable straight out of the fridge, like margarine. She says it doesn't taste like olive oil once you spread it on toast. I disagree, so I wouldn't use it for cinnamon toast. But with the strong influence of Mediterranean tastes in Wichita restaurants (mostly Lebanese), it's not unusual to be served bread before a meal with a dipping sauce of olive oil and zahtar (or za'atar) seasoning, so when I tasted this spread on whole wheat toast, that's what I thought of. And I just happen to have some in the cabinet, so I sprinkled a little on. Mmm!

Olive Oil Butter Spread

  • 1 cup softened (not melted) unsalted butter
  • 2/3 cup extra virgin olive oil
  • 1/4 teaspoon salt (or half this, if using salted butter)
Whip butter until loose. Slowly beat in olive oil, scraping down sides of bowl occasionally, until fully incorporated and smooth (mixture will be runny). Beat in salt. Pour into storage container and refrigerate until set.

Here's the original post from Kitchen Simplicity.

Oct 11, 2012

How to reorganize a kitchen, Part 3

First, read Part 1 and Part 2.

Enough with the mental exercise; let's get down to business!

Pull and give away. Pull out the Zone 4/purge items and give them to a young person/couple who's just setting up house. My DD just moved into her first apartment, so I compiled a nice pile of stuff for her to go through. She's home this weekend, and was only too happy to take my mini loaf pans and pumpkin carving tools. If you don't have someone to give away to, or after they're done picking it over, load all that stuff up and take it to Goodwill, DAV, or Sally Ann's (my MIL's boutique nickname for the Salvation Army store). You won't believe how great it feels to drive off, leaving that clutter behind! (Update: Here's a great idea via Apartment Therapy -- swap stuff with neighbors or friends. Just make sure you do more dropping off than picking up!)
     Oh, and if you're also tossing trash and recyclables while you pack, get two different colors of trash sacks, and consistently use one color for each type of waste.

Pull and pack. Whether or not you're actually moving, it would be ideal if you could set up some table space in or near to your kitchen where you can lay everything out. Pull out all the Zone 2 & Zone 3 stuff (leaving the Zone 1 stuff, 'cause you need it every day, right?). Then give it another assessment: Have you discovered more stuff you don't really need? Add it to your give-away stack.
Now, start grouping together things that you use together. Extra dishes that I use for large dinners can be packed with the linens or holiday table decorations that normally get pulled out at the same time, for example. Another idea: my soup ladle is bigger than anything else in my spoon-and-spatula canister that I keep out on the counter, and I rarely use it unless I'm making a big pot of something, so now I store that big soup ladle and my big soup pots together.
     If you're moving, start packing up the Zone 3 stuff first, because you can live a couple weeks without it. LABEL EVERY BOX CLEARLY! Write on the box a good description of its contents. Here are some nice looking labels for moving -- free printables!
     Why detailed labeling? Your Zone 3 stuff may not get unpacked for a while, so a few months later, when you're ready for a big gathering, you might not remember whether "glass stuff" means extra drinking glasses, or glass cake stands.
      Repeat the process with the Zone 2 stuff. Resist the urge to mingle the two if you have partially-filled boxes. Whether your reason for this is downsizing or a more efficient kitchen, these zones will start to make more sense once you begin unpacking and putting away.

By the way, where to get good, free boxes... Liquor stores are always a great bet. They get shipments in frequently, and the boxes are made to hold multiple glass bottles of liquid, so they're good and sturdy. If you stop in one and ask for boxes a few days before you'll actually need them, they may be willing to save them for you over several days. Be sure to say thank you! Another source is friends or family members who work in a place that receives regular shipments and normally breaks the boxes down for recycling. Your local craigslist or freecycle is another great source.

Next installment: Zone 1, and your moving-day kitchen kit.

Oct 7, 2012

How to reorganize a kitchen, Part 2

Or, questions to ask yourself when you're trying to downsize.

If you haven't already, read Part 1 of how to reorganize a kitchen. It's a fundamental step, and it's super easy!

In theory, at least...

When it gets down to reality, though, it can be kind of tough to let go of some items, even if you rarely use them. So here is a progression of questions to ask yourself when you're standing there with a widget in your hand, wondering whether to keep it or give it away.

Find this collection on Etsy at http://www.etsy.com/listing/102475691/empeco-bread-box-siftervintage-kitchen

Let's start with the practical:

  • When was the last time I used this?
  • What are the odds that I'll use it within the next six months? Name a percentage.

If you can't remember the last time you used it, then you're not keeping it for a practical reason, you're keeping it for an emotional reason. (More on that in a minute.) If you won't use the thing more than once or twice a year, then you might want to question whether you really need it. Exceptions may be made for special holiday traditions that you and your family truly treasure. For example, we always have homemade waffles with mixed-berry sauce on Thanksgiving and Christmas mornings, and once-in-a-blue-moon just because.

My kids (now in college) love that and look forward to it. It makes no sense for that waffle maker to be taking up space in my kitchen for the 363 days that it doesn't get used. Still, it's a beloved tradition, so I pack the thing away in a box in the basement, and pull it out just when we'll want it.

(No, that's not my photo, and no, I don't put sprigs of mint on our Christmas morning waffles. Or anything else, ever. But the sauce looks kinda like ours. Thanks, Taste of Home.)


Now, to identify those things that you don't really use, but are keeping for an emotional reason. Try asking...

  • Does it represent a happy memory? Or does just seeing it make you smile?
  • Would you feel guilty getting rid of it because Great Aunt Sadie brought it over from the old country?
  • Does it represent me being someone I wish I were, but really am not?

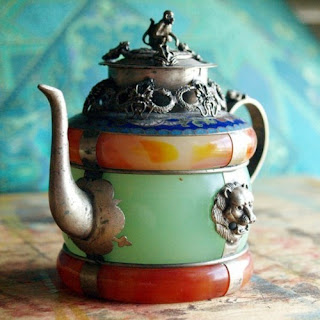
If you're just keeping it because you have some happiness attached to it, and if you have room for it, keep it!  Put it out on display (not buried in a drawer) and enjoy it. If you don't have room for it, however, consider getting a nice photo taken of it, and frame a small picture of it to keep in your kitchen where you'll see it often.

http://www.thefancy.com/things/268828651/Vintage-Teapot

If you're keeping a thing just because it belonged to some ancestor, let me share some advice that an older relative gave me years ago which was incredibly freeing. I was debating what to do with an old ornate table that had been my grandma's, but that I wasn't particularly fond of. This woman -- who collected antiques and was very into family history -- said, "If you don't love it, don't keep it. You have other ways of remembering your grandma." Which is absolutely right.

Okay, how about those things that represent some past hopes you had, or someone you once wanted to be. Say, cookie cutters that you envisioned sharing with your kids at Christmas cookie-baking time -- only to discover that they had no interest and you had no patience! Let it go! Be free! You have other ways to count your success as a baker, wife, husband, mother, etc.

I recently let my sewing machine go for this reason. I used to sew pretty often, and I still think of projects I'd like to do, but honestly, I really only go at it about once every three years. I had to come to grips with the fact that I am no longer A Person Who Sews. But that's okay. I am now A Person Who Works From Home, and A Person Who Volunteers, and A Person Who Walks the Dog (Almost) Every Day, which I wasn't before, so it's not like I'm becoming nothing by giving up this one aspect of myself.

Still having a tough time letting go of some things? Here are a couple more questions to ask yourself:

  • How tough or expensive would it be to replace this if I really do need one again in the future?
  • Is there someone else who might get more use and enjoyment out of this than I am?

In regards to that last question, I learned an important lesson from three people: Oswald Chambers, and my parents. In his classic book of devotions, My Utmost for His Highest, Chambers talks about keeping things for ourselves for so long, they become spiritual dry rot. He was speaking of spiritual blessings, but I think it applies to material things, too. When disassembling my parents' belongings for their estate sale, there were so many things they held on to for so long that the stuff had become worthless. If they'd given away that TV or those clothes or that sofa when they first realized they didn't need them, someone else might have enjoyed and been blessed by a few years' use of the goods. Instead, the stuff sat in storage until it was so outdated or decayed that it was only fodder for the dumpster. Now, I try to look at items I'm keeping but not using -- whether kitchen gear, clothing, or books -- and ask, "Am I depriving someone else of the use and joy of this item by hoarding it for myself?"

I hope these questions are helpful to you. Next installment we'll get down to sorting and packing!

Oct 3, 2012

How to reorganize a kitchen, Part 1

Because we recently moved to a house with less kitchen storage space, I had the perfect opportunity to re-think and reorganize how and where I store things in my kitchen. Whether you're downsizing, moving toward a more minimalist lifestyle, or just want a more efficient use of your small kitchen (or large one), you might want to try this approach. If you're doing this without a move forcing you to pack anyway, you might need to set aside an entire day or two -- depending on your stuff and your cabinets -- to disassemble things and put them back in a new, improved storage scheme.

Here's the first step -- and it's pretty easy:

Think and write. Think through what you have and how often you use it. First, off the top of my head and then, walking through my kitchen looking in cabinets, drawers, counter and pantry space (and hall closet, since some of my kitchen storage overflowed there over time), I broke my kitchen tools and equipment down into three four zones:
     Zone 1: Things I use every day or every week. For me, this was things like frying and sauce pans, sheet pans, measuring cups and spoons, knives and cutting boards, some of my spatulas, one set of mixing bowls, the hubby's coffee stuff, spices, and so forth. Also included in this is just enough everyday dishes to work for the two of us between dishwasher runs.
    Zone 2: These are things I pull out a few to several times a year: when we have more than a couple people over for dinner (extra/nicer plates, cloth napkins, bread baskets), or when I'm making something I don't make often (muffin tin, pizza pans, bread machine, etc.)
   Zone 3: These are the things I only pull out for large gatherings: All of the extra plates and silverware, large serving platters, crock pots, extra coffee cups and glasses. Also in this group is the stuff that's special and seasonal: waffle iron, dehydrator, extra-large soup pots.
   Zone 4 - Purge: Every kitchen could benefit from the occasional purge. Whether it's equipment for a hobby you no longer practice, or a gadget you thought you HAD to have that hasn't seen the light of day in years, everyone has some kitchen stuff they could jettison. For me, this included some cake decorating stuff, half a dozen small tart pans, stoneware cookie molds, and a plastic lettuce knife. (Really?!)

In Part 2, I'll explain how to start breaking down your kitchen contents into these zones, along with some packing and re-thinking tips.


Popular Posts