Showing posts with label Thanksgiving. Show all posts

Nov 26, 2014

7 roasted sweet potato recipes (including the most beautiful sweet potato dish ever!)

I've never been a fan of the traditional sweet potato topped with marshmallow dish -- even as a child. But sans all that sugar, they are quite healthy, and delicious to boot! I love to make simple, stove-top mashed sweet potatoes, with a little butter, maple syrup, and cinnamon added at the end. Try it along with a salty and/or spicy pork chop - yum!

So I'm looking for some oven-roasted sweet potato recipes that recreate that same flavor profile for Thanksgiving this year, and I thought I'd share my research. Here are a few. (Spoiler: I'm saving the most beautiful one for last!)


Roasted Sweet Potatoes with Honey and Cinnamon

By Tyler Florence, on Food Network. 5 stars, over 140 reviews.
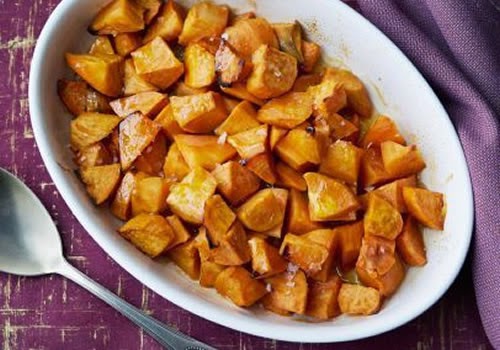


Honey Roasted Sweet Potatoes

By Ellie Krieger on Food Network; 5 stars, over 160 reviews. -- I like that this one goes light on the honey.


Cider Roasted Root Vegetables

By Elise at Simply Recipes. I always consult this site when looking for a new recipe; I have never had a bad dish here! This version sounds delicious. 

Branching out from straight-up roasting...


By Creekside Cook. The author says, "this post on my old blog was responsible for over 1 million hits." And I can see why! It sounds amazing. "Spicy, sweet, crunchy outside." But also a little time consuming. I probably won't try to pull these off for Thanksgiving, but they may get a chance on a less hectic day.

Here's an easier option...


Easy 15 Minute Roasted Sweet Potatoes

By Layers of Happiness. This recipe uses the microwave -- which I would totally do for an everyday meal! But I might try this same method in the oven for a special day.


Twice Baked Sweet Potatoes with Chipotle Cream

by Chez Us -- The description on this one won me over: "After I baked the potatoes, I scooped out their flesh and mixed it with some fried pancetta, sauteed green onions, a little butter and sour cream and a handful of freshly grated Gouda. After re-baking the stuffed potato skins until warm, I topped each one with a slight dollop of chipotle sour cream."

----

And here it is: this year's winner of the annual "Most Beautiful Sweet Potato Dish Award"! (Okay, that's not a thing, but when you see this, shouldn't it be?)


Crispy Sweet Potato Roast by Smitten Kitchen

Here's the author's summary:

You thinly slice a whole lot of sweet potatoes [you can use a mandolin or food processor] and arrange them in a butter and olive oil-brushed dish, and brush them with even more. ...slide slivers of shallots between... shower the whole thing with salt and black pepper... bake it covered long enough that the insides get tender, and uncovered long enough to get the tops brown and crispy.

This was posted six days ago, and as of today, it has 150 comments. Readers have been quick to share their own improvisations on the basic recipe. Here are some of the best (IMO)...

Reader tips and variations:

Add fresh rosemary and a splash of pure maple syrup towards the end.

I sprinkled feta and toasted pine nuts on top, instead of the salsa verde. It was amazing!

I crumbled feta cheese in the gaps and added some chili and lemon juice to the salsa verde and the result was great.

Very delicious. Sprinkled za’atar on top and made a sauce of yogurt, tahini, lemon, and a bit of salt.

I’ll be making this – with the addition of crisp pancetta and fresh thyme!

I am going to [replace] the scallions with poblanos and make a little chimichurri sauce to drizzle on top.

I usually do my holiday sweet potatoes with maple, chipotle, ancho, smoked paprika -- and fresh italian parsley on top after roasting.

The way I’ve been making them for years is in a gratin with a ton of garlic and salty butter and parmesan and breadcrumbs, the thinner the layer the better, b/c the top gets all crispy, crunchy with the parmesan and buttery breadcrumbs.

Have you ever tried chipotle chili powder with sweet potatoes? Life changing!

I made this tonight and topped with some leftover creme fraiche, it was great! The texture turned out perfectly. I used only 2 lbs of sweet potatoes and scaled everything down accordingly, but used all the same cooking times, 45 mins covered, 10 uncovered.

This was EXCEPTIONALLY GOOD! And reheated the next day in the toaster oven? Nom nom nom!

I made this tonight and it was GREAT. I added a bit of fresh thyme both underneath and on top! I halved the recipe and put it in a 1-quart oval dish. I also found that with really large potatoes I halved the slices and put the curved side up and they fit really well in the dish. At the end my oven didn’t brown it very well so I tossed it under the broiler and watched it like a hawk!

I made this with a mélange of sweet potatoes and russet, and added a teaspoon or so of dried sage, salt and pepper to the remaining butter/olive oil mixture… divine!

I topped it with thinned Mexican crema mixed with minced chipotle in adobo. It was a hit!

I have used a food processor to slice potatoes, and it works very well. You just have to buy potatoes whose diameter will fit in the tube, and then guide them / stabilise them with the pusher.

Also culled from the comments, a few extra tips from the author:

Cast iron does seem to give food a nice crisp... but I used a Pyrex baking dish last time I made this and it crisped up just fine.

In reply to reader's questions: "Do you do everything and bake it completely and then just reheat day of? Or do you arrange everything and bake the day-of?" — Either way will work.

Re, thin slices — Yes, I use a mandoline.... Re, protecting your fingers, I have one rule: the last inch isn’t worth it! I just don’t use the slicer for the last inch of whatever I’m cutting. I’ll hand-chop it. All of my fingers are intact, so I’d say this system is working out for me. :)

-------------------

All images by the respective blog owners.

Nov 15, 2014

Crockpot Green Bean Casserole

Image from campbellskitchen.com

Save your oven for other things, and save some day-of panic: Here's the classic green bean casserole that everyone wants for Thanksgiving, tweaked to work in a crock pot / slow-cooker, and with optional make-ahead instructions.

Slow-Cooker Green Bean Casserole Recipe

Slow-Cooker Size: 4- to 6-quart       Makes 16 to 20 servings

30 oz. fresh or frozen green beans, cooked and well-drained
2 (10 3/4-oz.) cans cream of mushroom soup, undiluted
      or make your own
1/4 to 1/2 c. shredded mozzarella
2 (4.5-ounce) jars sliced mushrooms, drained  (optional)
1 T. dried minced onion (omit if using garlic-flavored soup)
1/4 teaspoon pepper
1 - 1.5 t. kosher salt (taste before adding)
1 (6-ounce) can French fried onion rings

Combine first six ingredients in a large bowl. (Beans thru pepper.)

Optional: Store covered in your fridge until ready to cook. Add an extra hour of bake time because it will be cold when it goes in the crockpot.

Spoon casserole mixture into a lightly greased slow cooker.

Cover and cook on LOW 2 hours. (3 hours if all ingredients are refrigerated.)

Taste and add salt as necessary. Sprinkle onion rings on top of casserole. Cover and cook on LOW 30 more minutes.

(I've lost the source for this recipe. If you recognize it, please comment.)

Nov 14, 2014

Thanksgiving and Christmas food prep FAQs

Food image from PopSugar

Trying to plan a Thanksgiving or Christmas meal?


Here are some tips, calculators, and checklists.

Image from theKitchn

Turkey


For any meat, here is the essential gadget to make sure your meat comes out perfectly every time: Meat thermometer with remote and two probes.* Getting a model with two probes means you can stick one probe in the white mean, one in the dark meat, and measure both without opening the oven or grill!


Image from farmflavor.com

Ham


Image from campbellskitchen.com

Vegetables

  • Make-ahead crockpot green bean casserole. Save your oven for other things, and save some day-of panic: Here's the classic green bean casserole that everyone wants for Thanksgiving, tweaked to work in a crock pot / slow-cooker, and with optional make-ahead instructions. Classic green bean casserole for crockpot.
  • Roasted vegetables timetable. The number one must-do side dish at our house -- besides the turkey, of course. Oh, and pumpkin pie! Okay, the third-most popular dish: roasted vegetables. A slow roast works oven magic, turning onions, carrots and bell peppers into sugar-free candy-sweet goodness! Here's a timetable for roasted vegetables: what goes into in the oven when, to make everything come out perfect.

This is my favorite pan for roasted vegetables, and anything else that can be made on a rimmed cookie sheet: USA Pans Jellyroll.* LOVE LOVE LOVE THIS PAN!!! Bakes evenly, rinses off like brand-new teflon every time. Everyone in my house has been threatened to not even think of co-opting this for some craft or garage project!


All foods: How much per person?


  • Here's a thorough chart from Good Housekeeping, showing per-person serving recommendations for 8, 10, 12, 16, 20 and 24 people, for 10 popular holiday foods. It includes turkey, stuffing, potatoes, green beans, sweet potatoes, cranberry sauce, pie, and more. View the pdf.


Holiday meal planning checklists and calculators


  • An Excel spreadsheet that you can plug your number of guests into (including how many are vegetarians!), and it tells you how much food to buy. The page where you download it is a little confusing; just scroll down until you see this:

Would you rather have pictures?

Here's a well-done info graphic from The Savory, showing turkey thawing time, brining time, brining recipe, roasting time, and more. This image is only one small part of it:

Image from The Savory

* Note: Product links in this post are to my Amazon store where I get a smidgen of the sales, but I truly use and fanatically love every product I link to.

Nov 13, 2014

20 Cranberry Sauce Recipes

A variety of cranberry sauce recipes, for Thanksgiving or Christmas...


image: OurFamilyEats

Roasted or Baked Cranberry Sauce

Simple Roasted Cranberries (Gluten Free, Grain Free, and Paleo) from OurFamilyEats. I love that this one really is simple, and that it uses maple syrup for the sweetener.

Bobby Flay's Baked Cranberry Sauce, which calls for finishing it off with a quarter cup of bourbon. Some reviewers substituted other liquor or liquers (orange being a popular flavor). 41 reviews, and every one of them 4-star!

Roasted Cranberry Sauce with Herbed Candied Walnuts, from Bon Appetit. Lots of sugar in this one!

Boozy and Baked Cranberry Sauce. Even though it has "boozy" in the name, its alcohol content is much less than Mr. Flay's. Also looks easy: just four ingredients.


Sugar-Free Cranberry Sauce

image: The Vintage Mixer


And another "sugar-free" cranberry sauce recipe, but it uses honey. You could sub maple syrup or your preferred sweetener. It also includes crushed pineapple; interesting!

And another. This one calls for Equal, but a couple commenters said they used Splenda and it worked well.

Paleo-friendly cranberry sauce; uses apple juice and maple syrup for sweetener. (Listed as 
Paleo/GF/DF/EF/SF/NF)

Another Paleo cranberry sauce, from nomnompaleo, using sweet cherries and apple juice.


Traditional Stove-Top Cranberry Sauce Recipes

image: Simply Recipes

Every recipe I've ever tried from Elise at SimplyRecipes has been great. Here's her traditional recipe. But she also suggest various add-ins. I might try blueberry! 

(And her recipe is the same as the most popular cranberry sauce at AllRecipes; more than 1200 reviews, and still five stars!) 

Another classic cranberry sauce recipe; this one from Pioneer Woman. Similar to the others, but uses maple syrup in place of sugar, and orange juice in place of white sugar.

Unique Cranberry Sauce Recipes

This page at Fun & Food Cafe features five different cranberry sauce recipes, with unusual ingredients. I like the sound of the second one, which has raspberries and walnuts!

Ginger Cranberry Sauce, via RecipeLion.

Another from the same source: Cranberry Sauce with Apples (and Mandarin oranges, and pineapple).

How about Cranberry Sauce with Jalapenos? I think that would be a big hit with smoked turkey.

Happy Thanksgiving!


Nov 29, 2013

DIY fruit and flower centerpiece


I like to decorate simply for holidays, and one way I often do that is to gather bit and pieces from my own yard to create centerpieces for tables, the mantle, etc.

Inspired by this lovely image at StyleMePretty, I decided to also incorporate some fruit for our Thanksgiving tables this year.


Here are some of the components I used...


Top left: twigs with berries off a flowering tree in our front yard, whose species I don't know. Hawthorne, possibly.
Top right: a $4.88 bunch of carnations. Small mums would be lovely, too. In retrospect, I wish I'd picked something more golden to help the color palette lean more toward autumnal colors, but oh well! Not a big deal.
Lower: greenery from my yard -- on the left, a small-leafed variety of trailing euonymus; tendrils of vinca minor on the right. If I were doing this for a Christmas table, I would definitely use some evergreen sprigs, too.

I also purchased some clementines and small Gala apples. I was hoping to get plums, since I loved the darker hues in my inspiration image, but alas, no plums at the store today. I would have liked to include pears as well, but they were too big for this arrangement. 

Now to the steps...


I started with a large pasta bowl, and placed in the center of it a votive candle holder, filled it 3/4 full with water, then arranged three apples and three clementines around it in an asymmetrical pattern. (Top left image.)

Next, I snipped the carnations down till they were just long enough to sit in the votive of water with their heads resting on the fruit, and tucked them into the votive holder until the blossoms filled the space. I used three or four, depending on how full they were. 

Then I pruned the euonymus down to just one or two bunches of leaves, so that they functioned more like a flower. I tucked a few of these in between the carnations, just barely peeking above them.

Then I tucked a few berry sprigs in around the perimeter, as well as a few pieces of vinca, then stepped back to assess (the lower right image in the montage above). Hmm... definitely needs more filling in around the perimeter.


So I kept adding things in. I tucked a couple flowers into the especially bare spots, and gathered some more and longer strands of vinca, and kept adding till I was happy with the fullness. The photo above shows it from directly overhead, so you can see how things are arranged. As you're making an arrangement, be sure to assess it from all angles that it will be seen from. A table centerpiece needs to look good from all sides, while something to go on a mantel, sideboard or buffet has a more limited view.

We have two tables, so two arrangements are needed. And because these arrangements are going on fairly narrow rectangular tables, I made the vinca only extend out on two sides of the bowl. 

Here are the finished pieces. I'm very happy with how they came out!


I also love the price! Here's how it breaks down...
  • Bowls, votives, berries and greenery: Free; I already had them.
  • Fruit: Total of about $4. The apples were three for $1, so two bucks there, and probably about the same for the clementines. I've tossed the package, but it was a two or three pound bag, and under $7. I only used about a quarter of the bag.
  • Flowers: Less than $5.

So my two arrangements came in under $10. -- for both of them! Sweet!

Nov 23, 2013

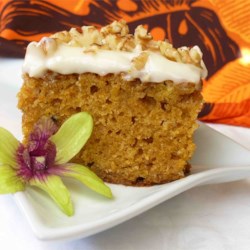
Recipe review: Pumpkin cake with cream cheese frosting

This recipe came up on AllRecipes when I was looking for a sheet cake to make for a potluck, but it's actually for a 10x15 cake pan. Maybe "sheet cake" means different things in different parts of the country, but here in Kansas, it means a very thin cake -- about 1" deep -- baked in a rimmed cookie pan. This time, though, I made it in two 8" x 8" foil cake pans, so as to not have to retrieve my pan. It worked for that, too.

Several reviewers commented that the cinnamon was too weak in its given amount and that it needed other spices; others opined that the frosting needed more cream cheese flavor. So I made some tweaks, and it turned out perfect!

Here is the original recipe, and here is my edited version...

Pumpkin Cake

1 (15 oz.) can canned pumpkin puree
2 cups white sugar
1 cup vegetable oil
4 eggs
2 cups all-purpose flour
2 teaspoons baking soda
2 teaspoons pumpkin pie spice
1 teaspoon ground cinnamon
1/2 teaspoon salt
cream cheese frosting (see below)
1 cup chopped walnuts or pecans (optional)

Preheat the oven to 350 F (175 degrees C). Grease and flour (or spray) a 10 x 15" cake pan.

In a medium mixing bowl, beat pumpkin, sugar, and oil. Add eggs, and mix well.

In small mixing bowl (a 4-cup measuring cup works nicely), combine flour, baking soda, cinnamon and salt, and stir till well combined. Add these dry ingredients to the pumpkin mixture: pour in a third, and stir a bit; a third and stir a bit; the rest, and stir gently until well blended. Do not overstir.

Pour batter into a greased 15 x 10 inch baking pan. Bake for 25 to 30 minutes, or until a toothpick inserted in the center comes out dry. Cool completely before frosting.

Spread frosting on top, then sprinkle with nuts, if desired.
---

Cream cheese frosting

 1 (8 oz.) package cream cheese, softened
 1/2 cup butter, softened
 1 teaspoon vanilla extract
2 - 3 cups powdered sugar

Using a mixer, blend the cream cheese, butter and vanilla; mix well. Add in powdered sugar gradually. At about 1.5 cups of sugar, taste test, and continue gradually adding and tasting until it's to your desired sweetness.


*Note: If made in a full-size cookie pan -- also called a jelly roll pan -- this could be used to make a pumpkin roll. Once baked, the semi-cooled cake is turned out onto a clean, flat dish towel, then gently rolled up while it cools. Once cooled, you would unroll it, spread it with cream cheese frosting, then roll it back up, wrap in plastic wrap and chill for an hour or more. To serve, cut in 1" slices. See Libby's website for how-to details.
.
.
The sheet cake image is from AllRecipes. The pumpkin roll image is from Libby's website.
.
.
.
.
Follow Me on Pinterest

Oct 6, 2013

Timetable for roasting vegetables

I have previously posted this in recipe form, but since I work out a detailed timing schedule for all of my cooking on Thanksgiving and keep it in a file on my computer,* I thought I'd share my schedule for making a large batch of roasted vegetables for a crowd.

This schedule assumes you'll be serving the meal at about 12:30. Adjust as needed.
.

Roasted vegetables cooking schedule

earlier** - chop carrots, onions, peppers and zucchini
10:30 - preheat oven to 400 F; cut potatoes
10:50 - put carrots and potatoes in oven; snap the asparagus
11:10 - turn carrots and potatoes
11:35 - take carrots and potatoes out; put onions and peppers in
11:45 - turn onions and peppers
11:55 - take onions & peppers out; put zucchini in
12:05 - add asparagus to zucchini; toss; put back in
12:15 - take veg's out of oven

The full recipe.

Make-ahead tip: The vegetables can be roasted and kept at room temperature up to 2 hours in advance or refrigerated up to 1 day in advance. Reheat from room temperature at 350° F to 400° F. Do they taste as amazing as roasted veggies fresh out of the oven? Not quite, but still delicious!

*This makes me sound super organized in the kitchen. Ha! The REASON I spell all this out carefully and keep record of it is because, while I can (and do) get by with winging-it in the kitchen for daily cooking, holidays and parties require more organizing than I can do in my head. And I find that the less info I try to store in my head, the less wigged-out I get trying to stay on top of it all!

**For all the veggies except the potatoes, you can chop them earlier that morning, or do them the day before and store in the fridge, grouped according to what goes into the oven together.

Popular Posts